
HOW TO USE MYFITNESSPAL TO TRACK YOUR FOOD WITHOUT SCREWING IT UP
You drank the Kool-Aid, or someone twisted your arm and convinced you to log your daily food intake. It’s a worthwhile effort because guessing and estimating will only get you so far.
And there is really no better way to accurately know how much you are eating.
If you’re getting serious about losing fat or building muscle, how much you eat makes all the difference.
The downside of using apps like MyFitnessPal is that there’s a bit of a learning curve and it can be a little overwhelming in the beginning.
We’ll, you’re in luck because we are here to:
Walk you through the steps that will get you going in the right direction.
Show you the common problems when you set your goals up.
Show you how to log food/meals the right way.
Show you how to get more accurate with your food quantities when logging.
First things first… if you want to do this right you need 3 things:
A computer or smartphone to use the app/website
A digital scale that will measure ounces and grams
Patience and consistency (these aren’t on Amazon)
Setting up the app:
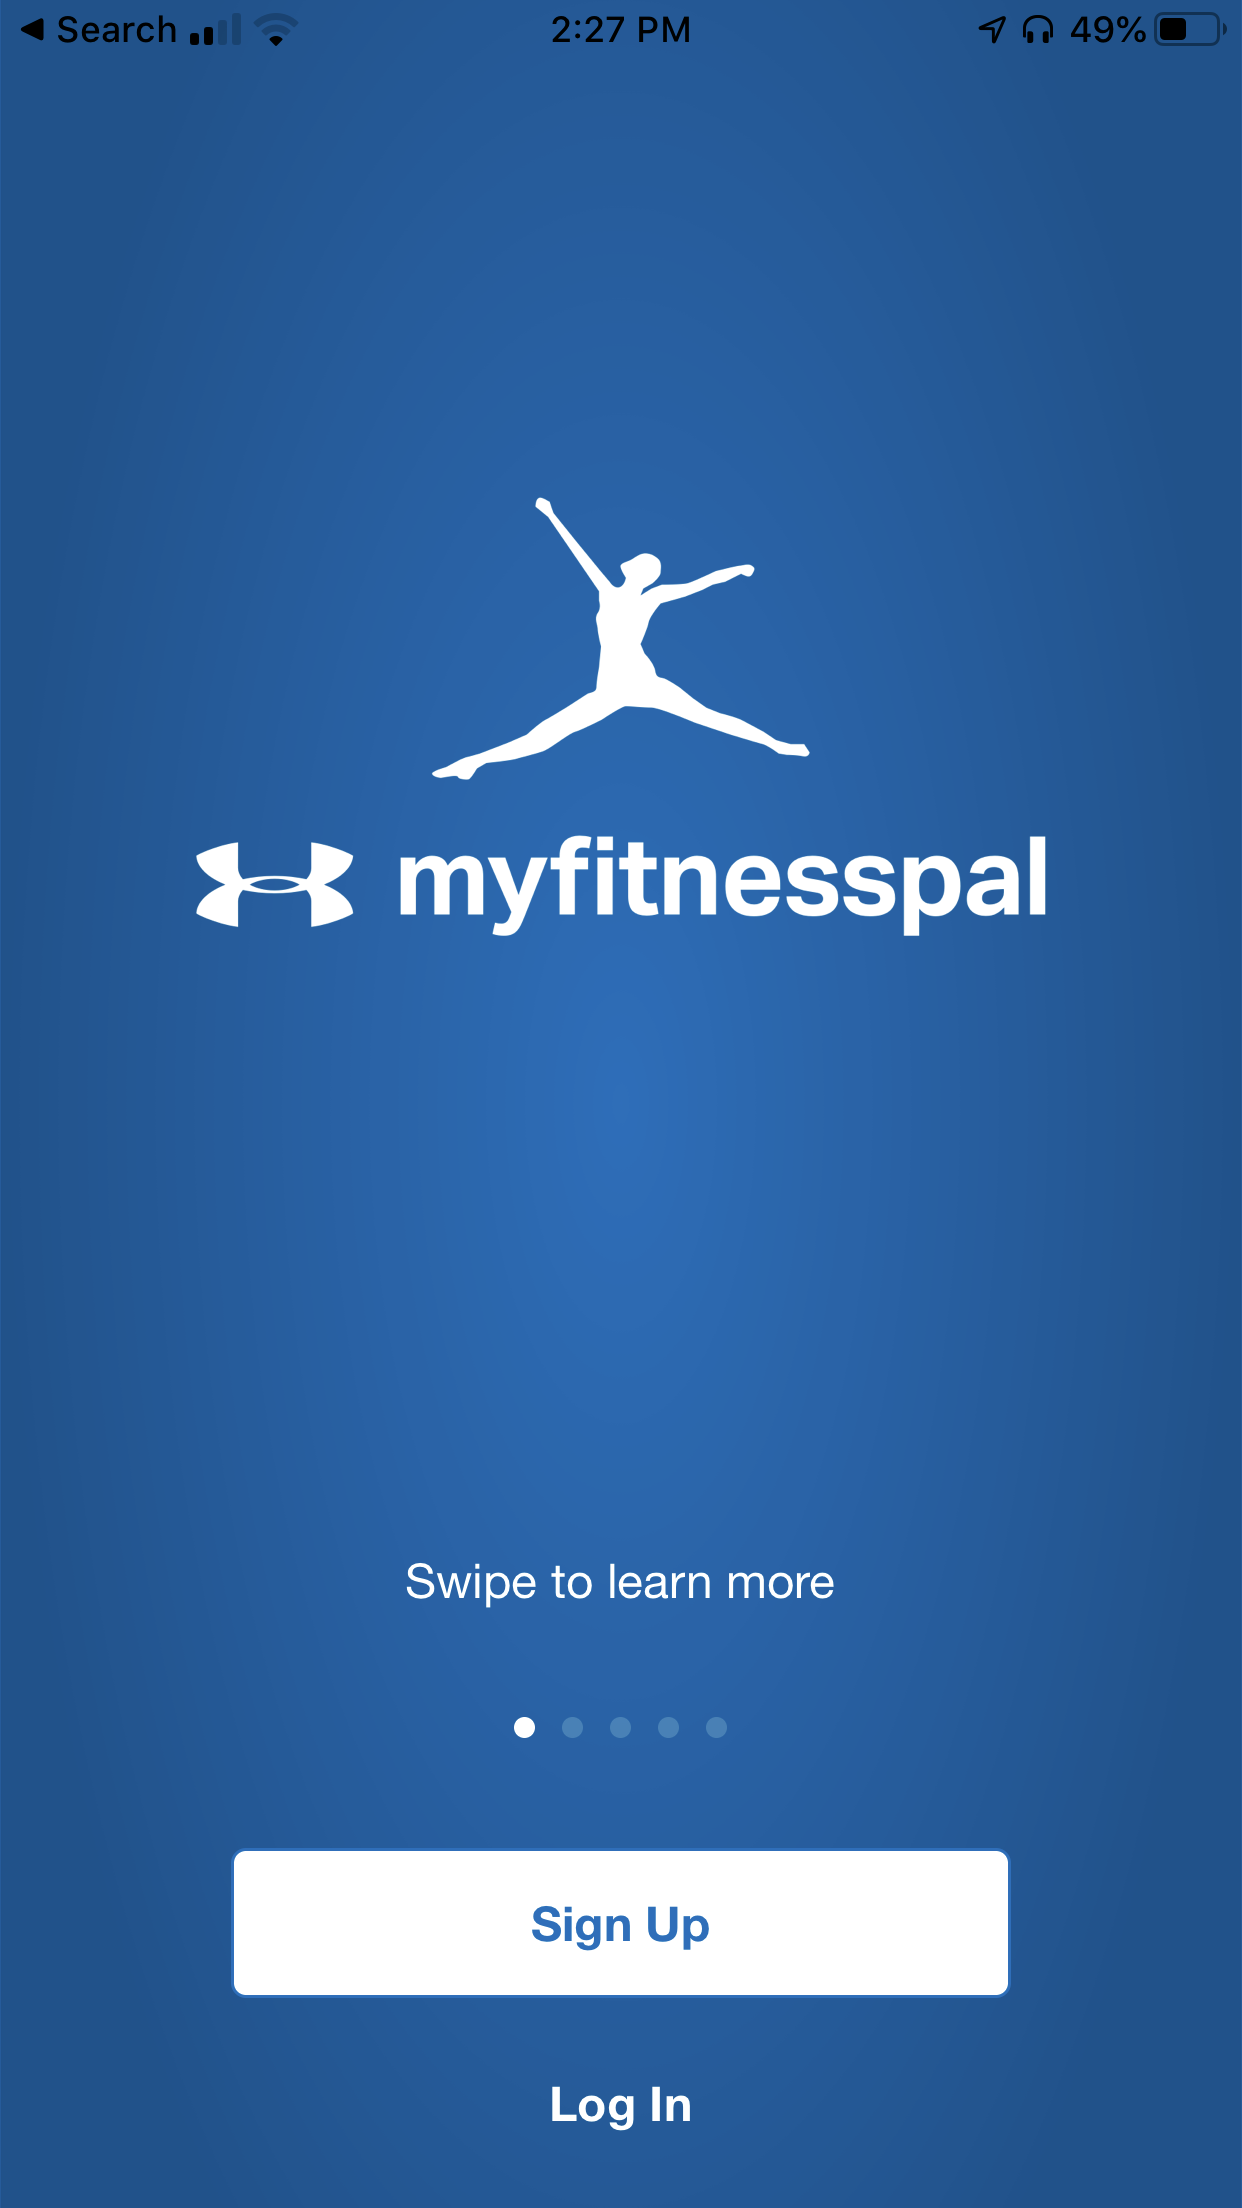
Download the app from the app store or the google store, open it and sign up with your email address or Facebook account.
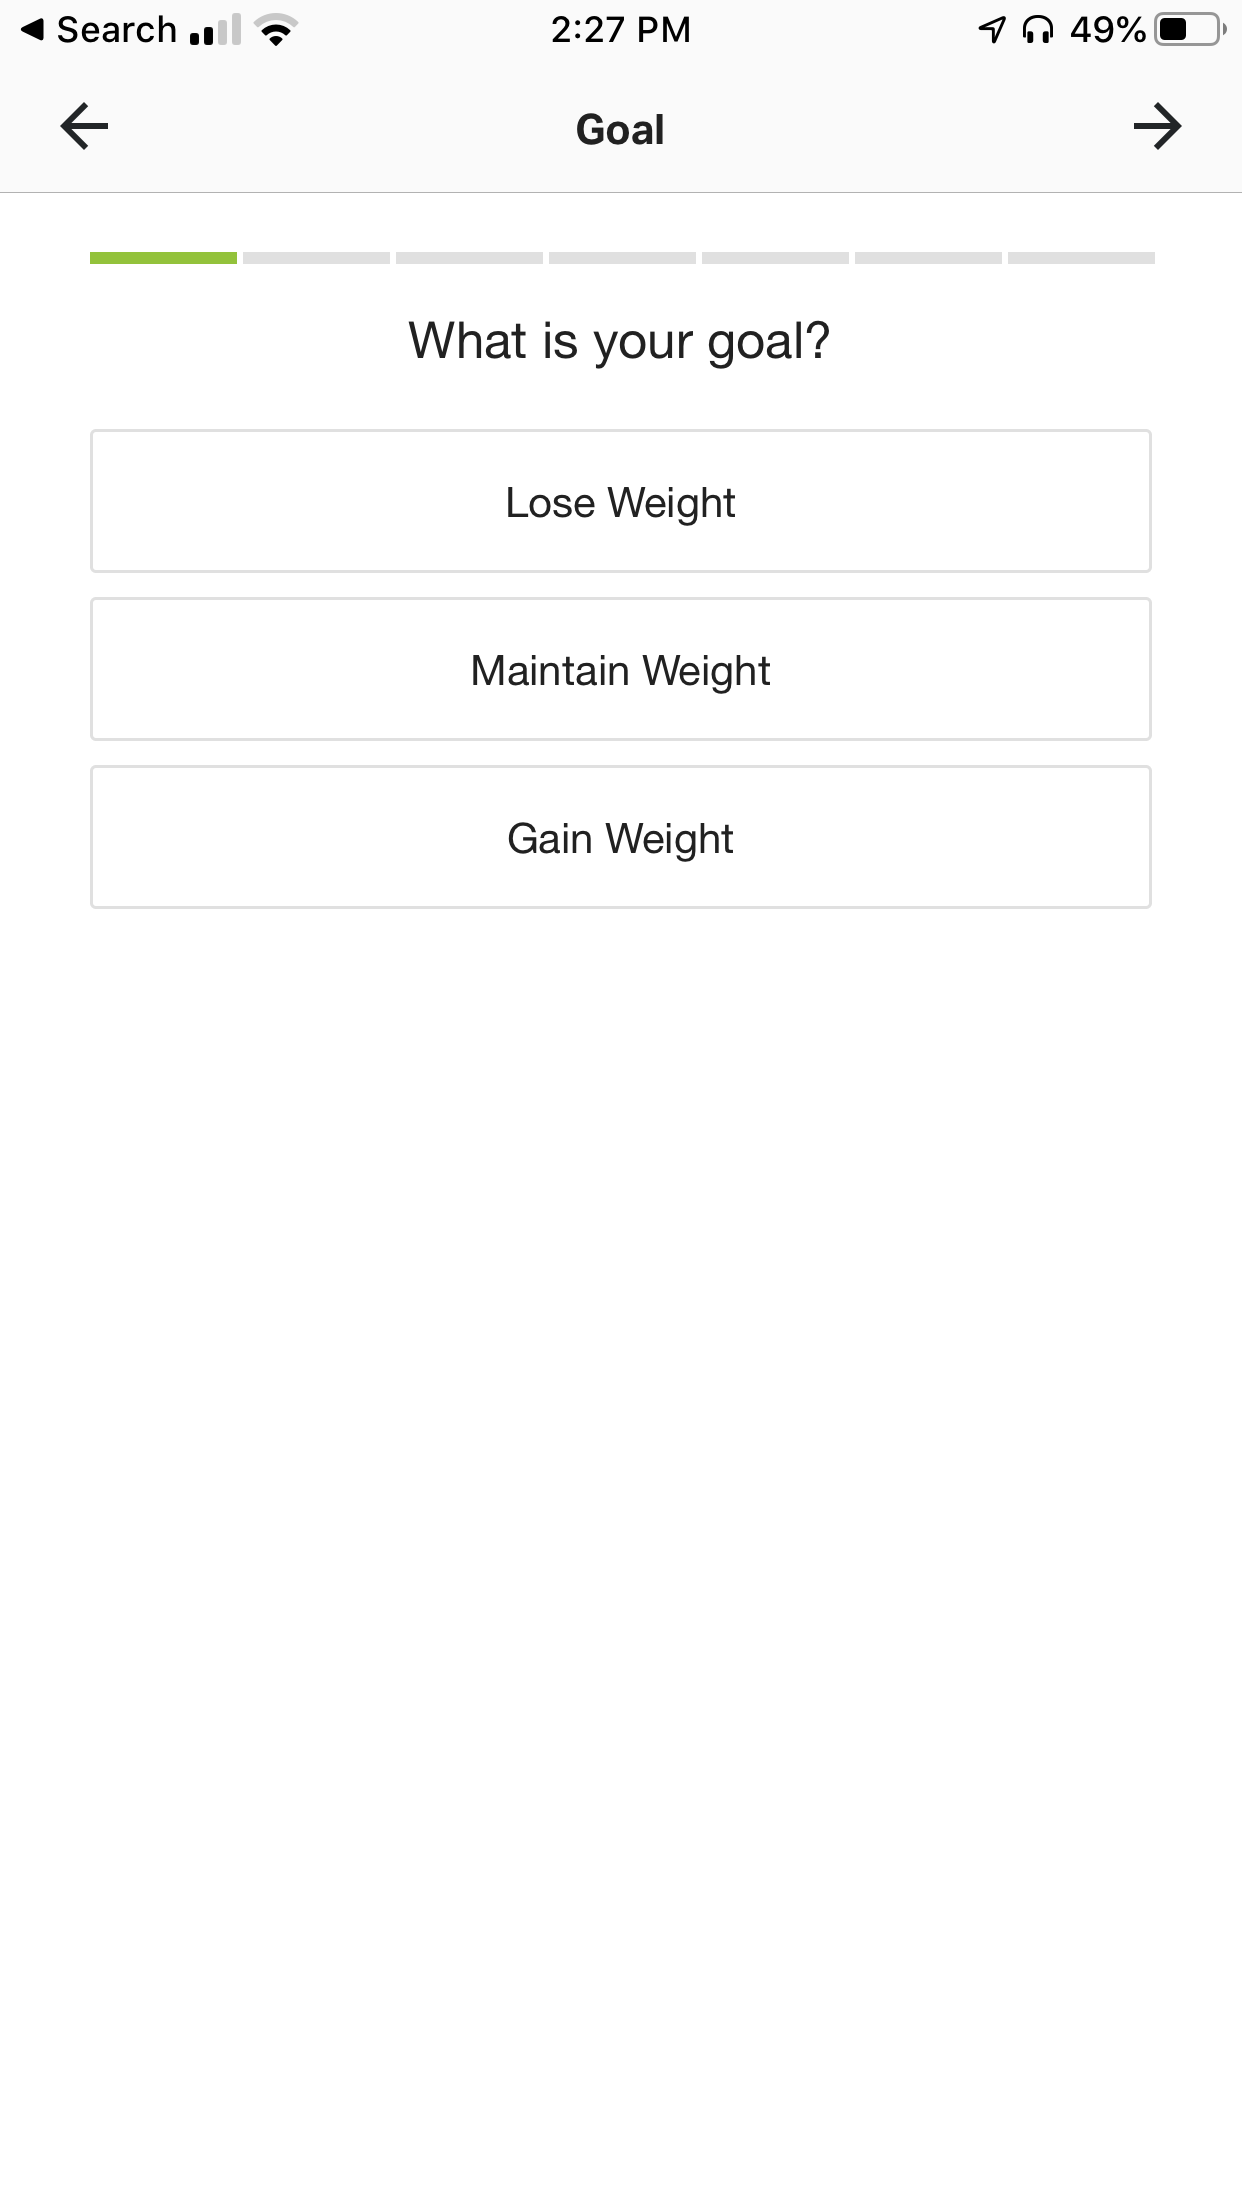
Next, it’s going to ask you what your goal is.
-> Select “Maintain Weight”.
If you pick one of the other goals it’s going to hijack your calorie goals, and it takes a few more steps to reset it.
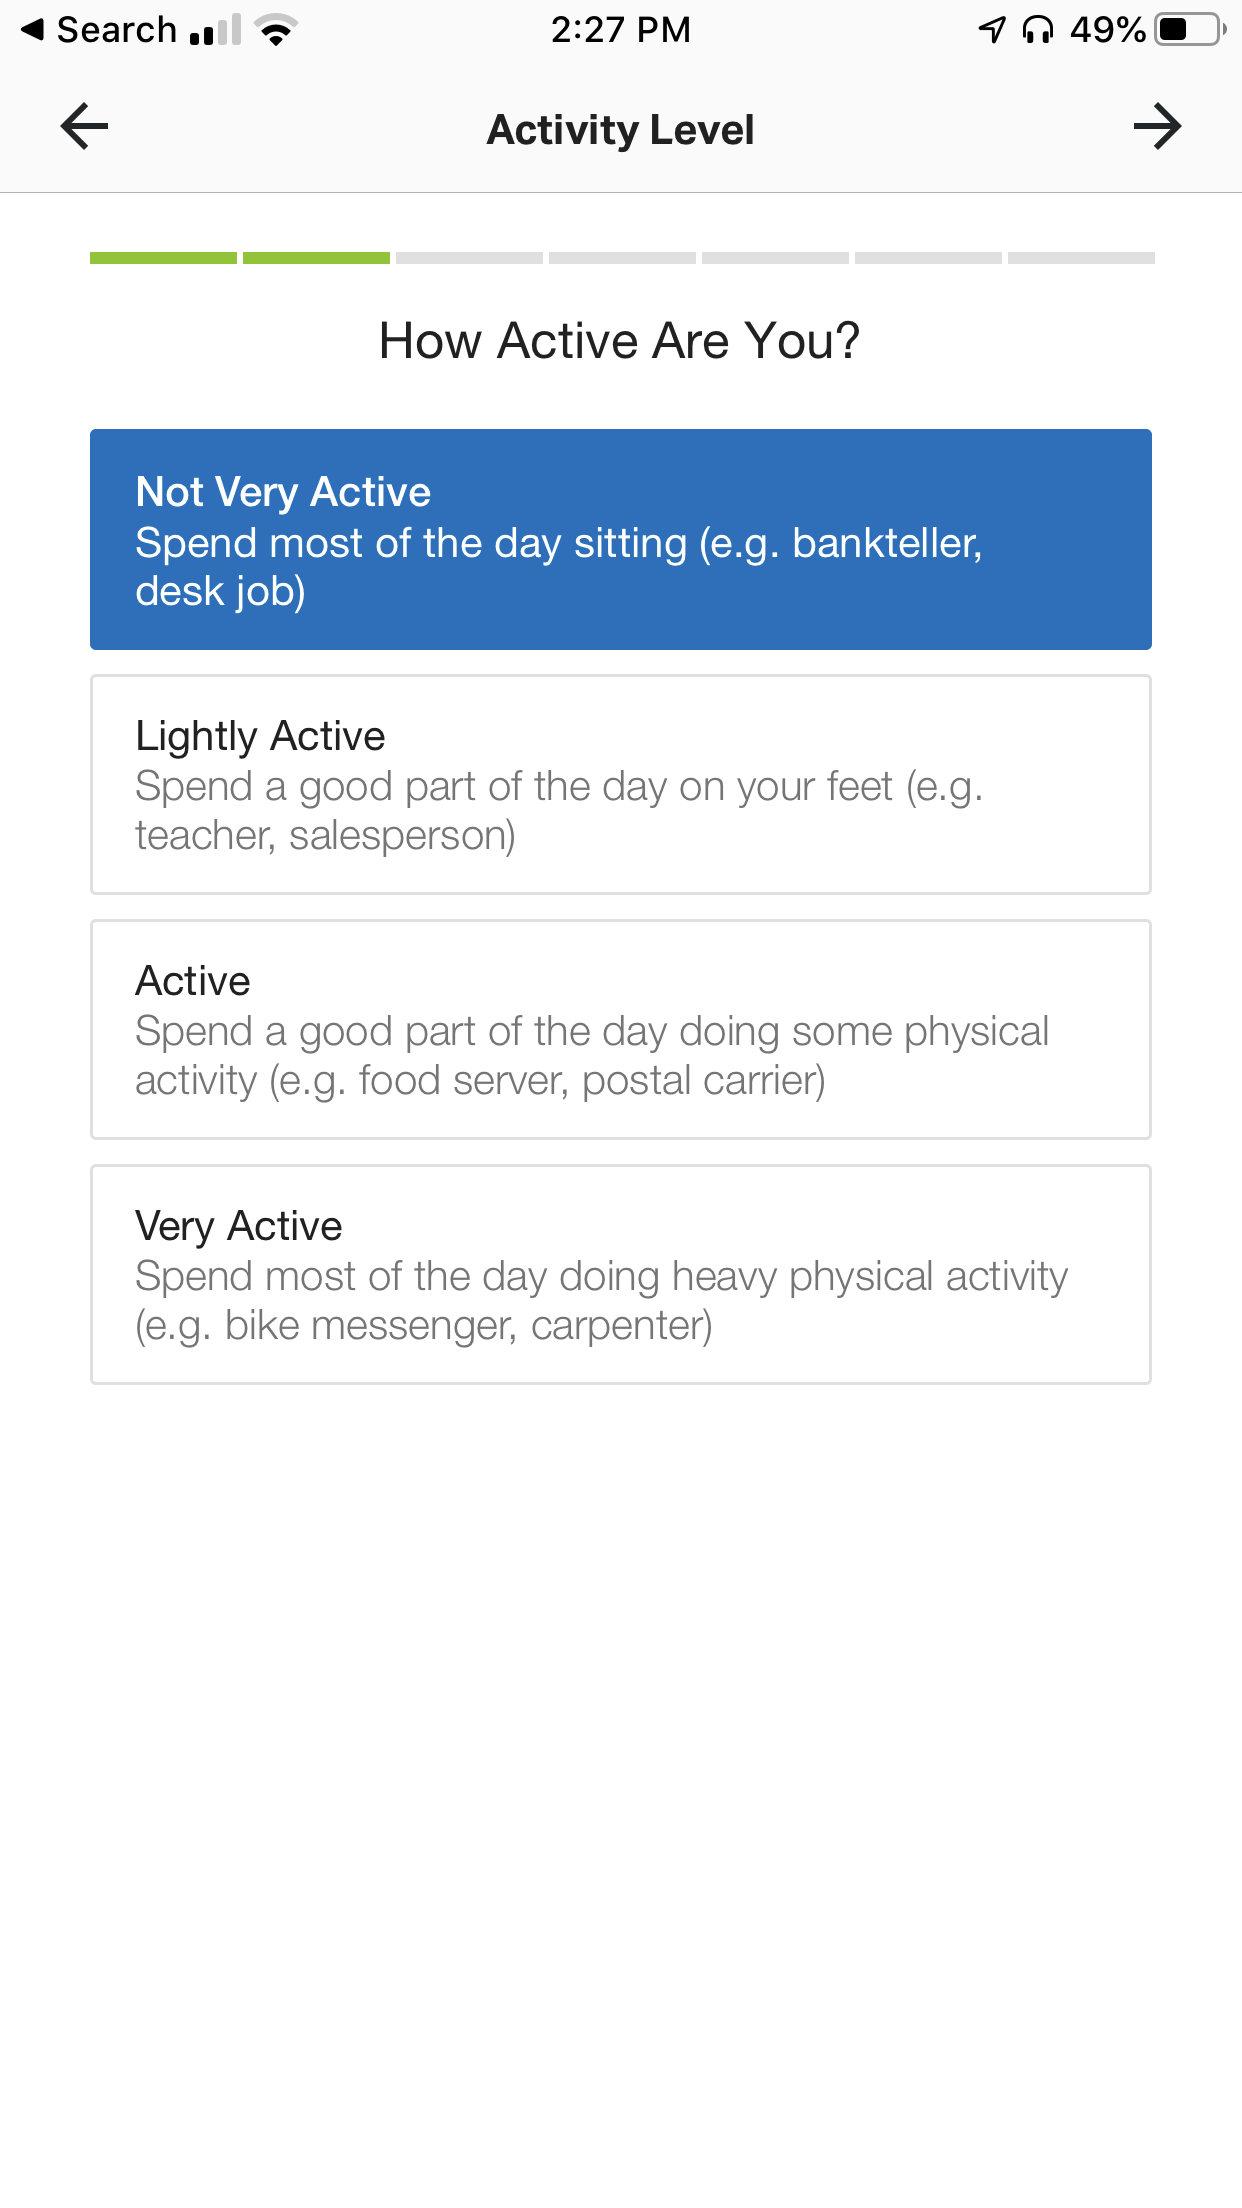
Next it’s going to ask you about your activity level. Again, it’s trying to adjust your calorie goals for you.
-> We want the control ourselves, so select “Not Very Active”.
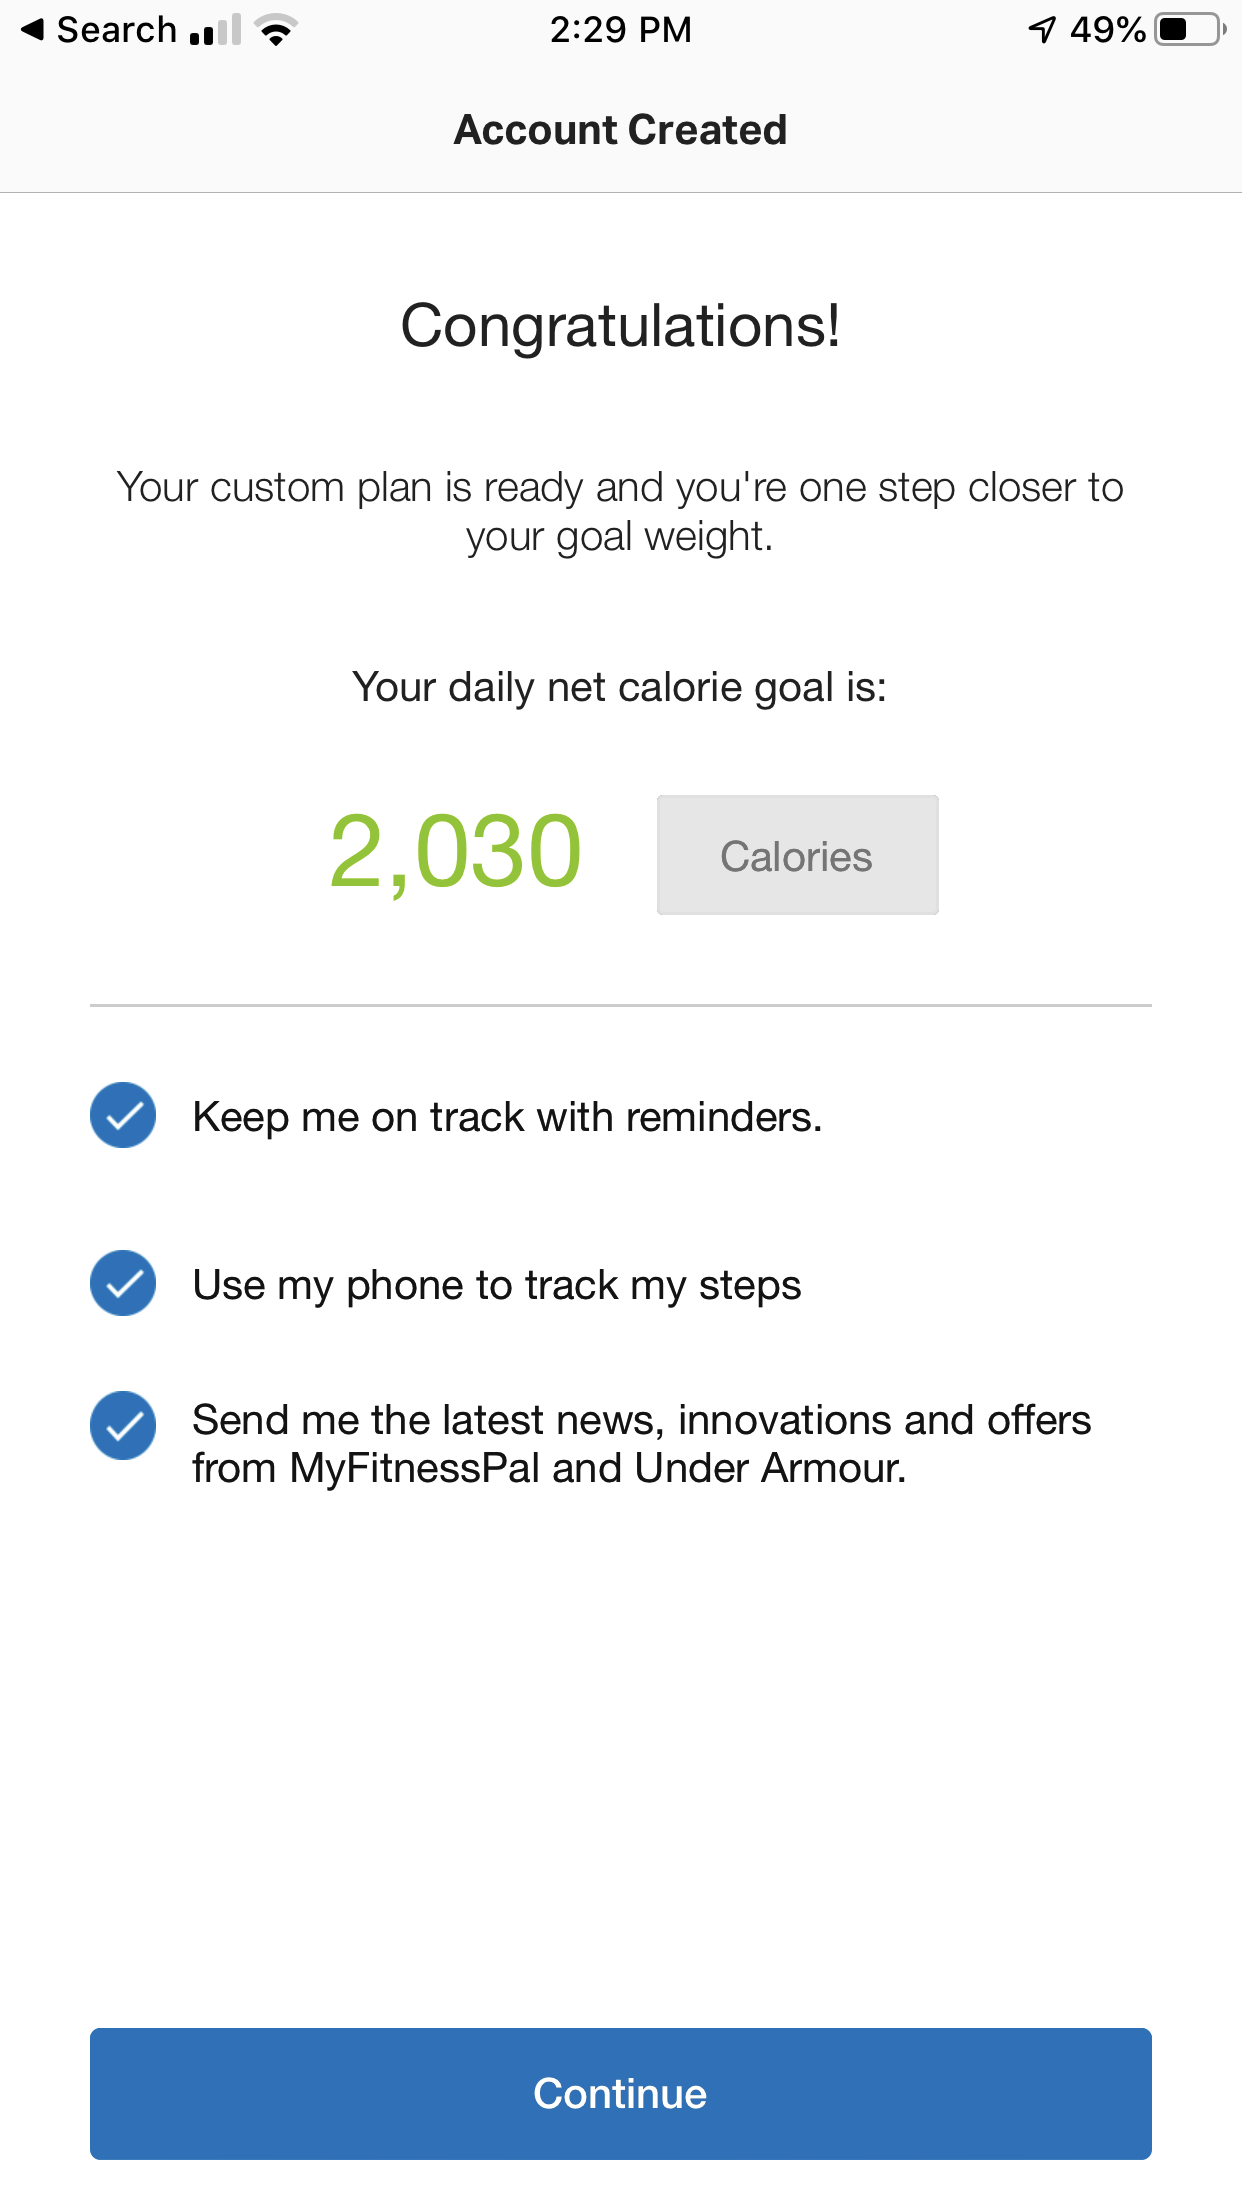
Next, fill out the questions about your sex, age, location, height and weight.
Then pick a username that you can remember!
Ok, now it’s going to spit out your recommended calories. The number it’s giving you is its estimate of how many calories you should be eating to maintain your weight. You can change that number later.
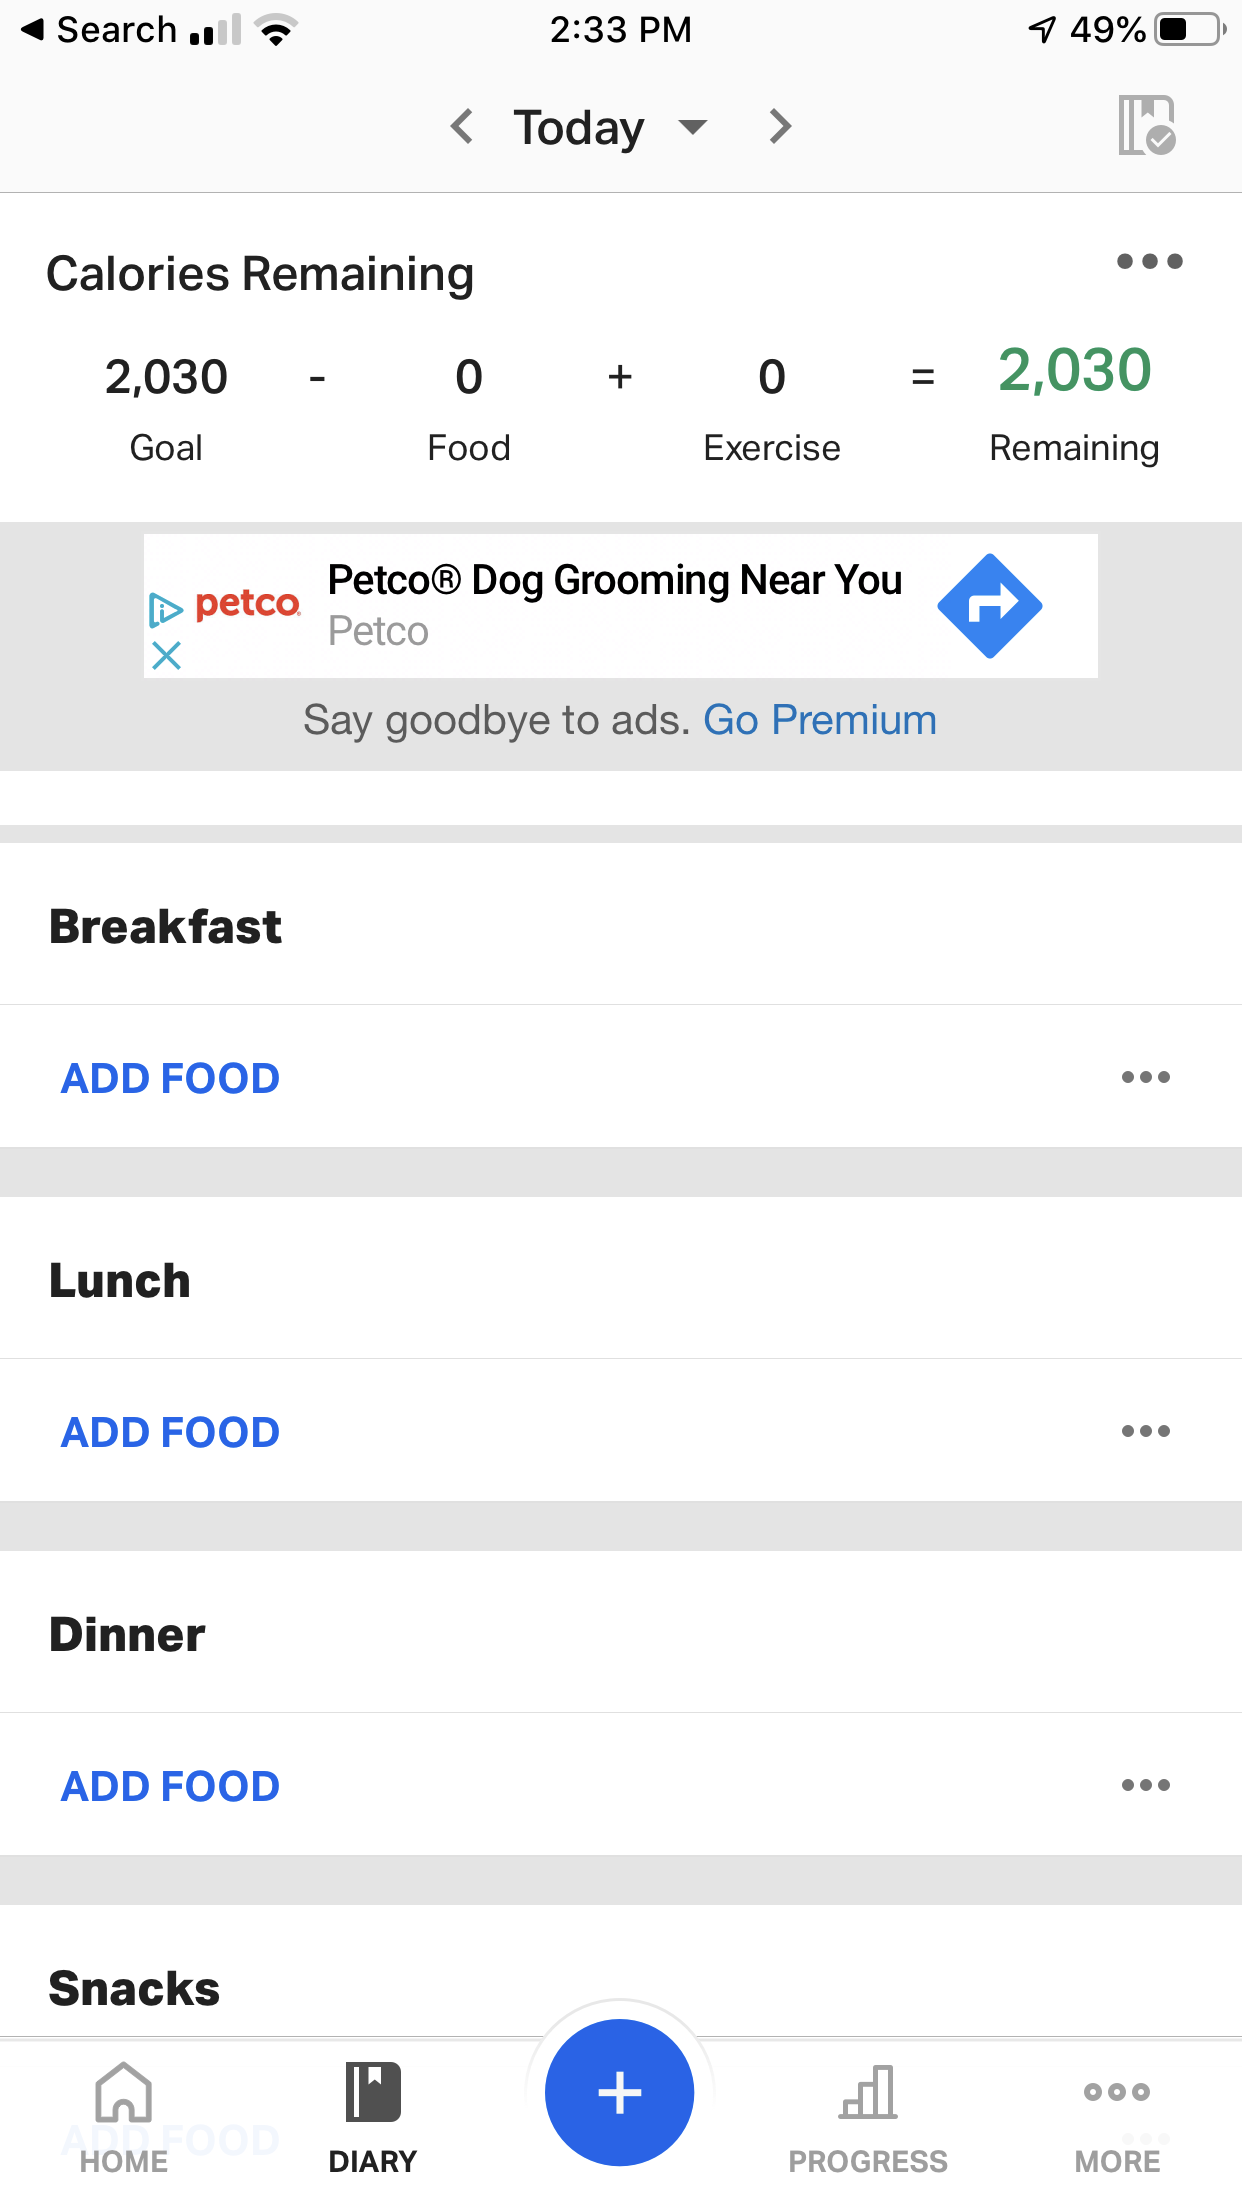
The next screen should look as follows. Get used to it. This will be your home screen that you’ll see each time that you open the app. It has articles, etc.
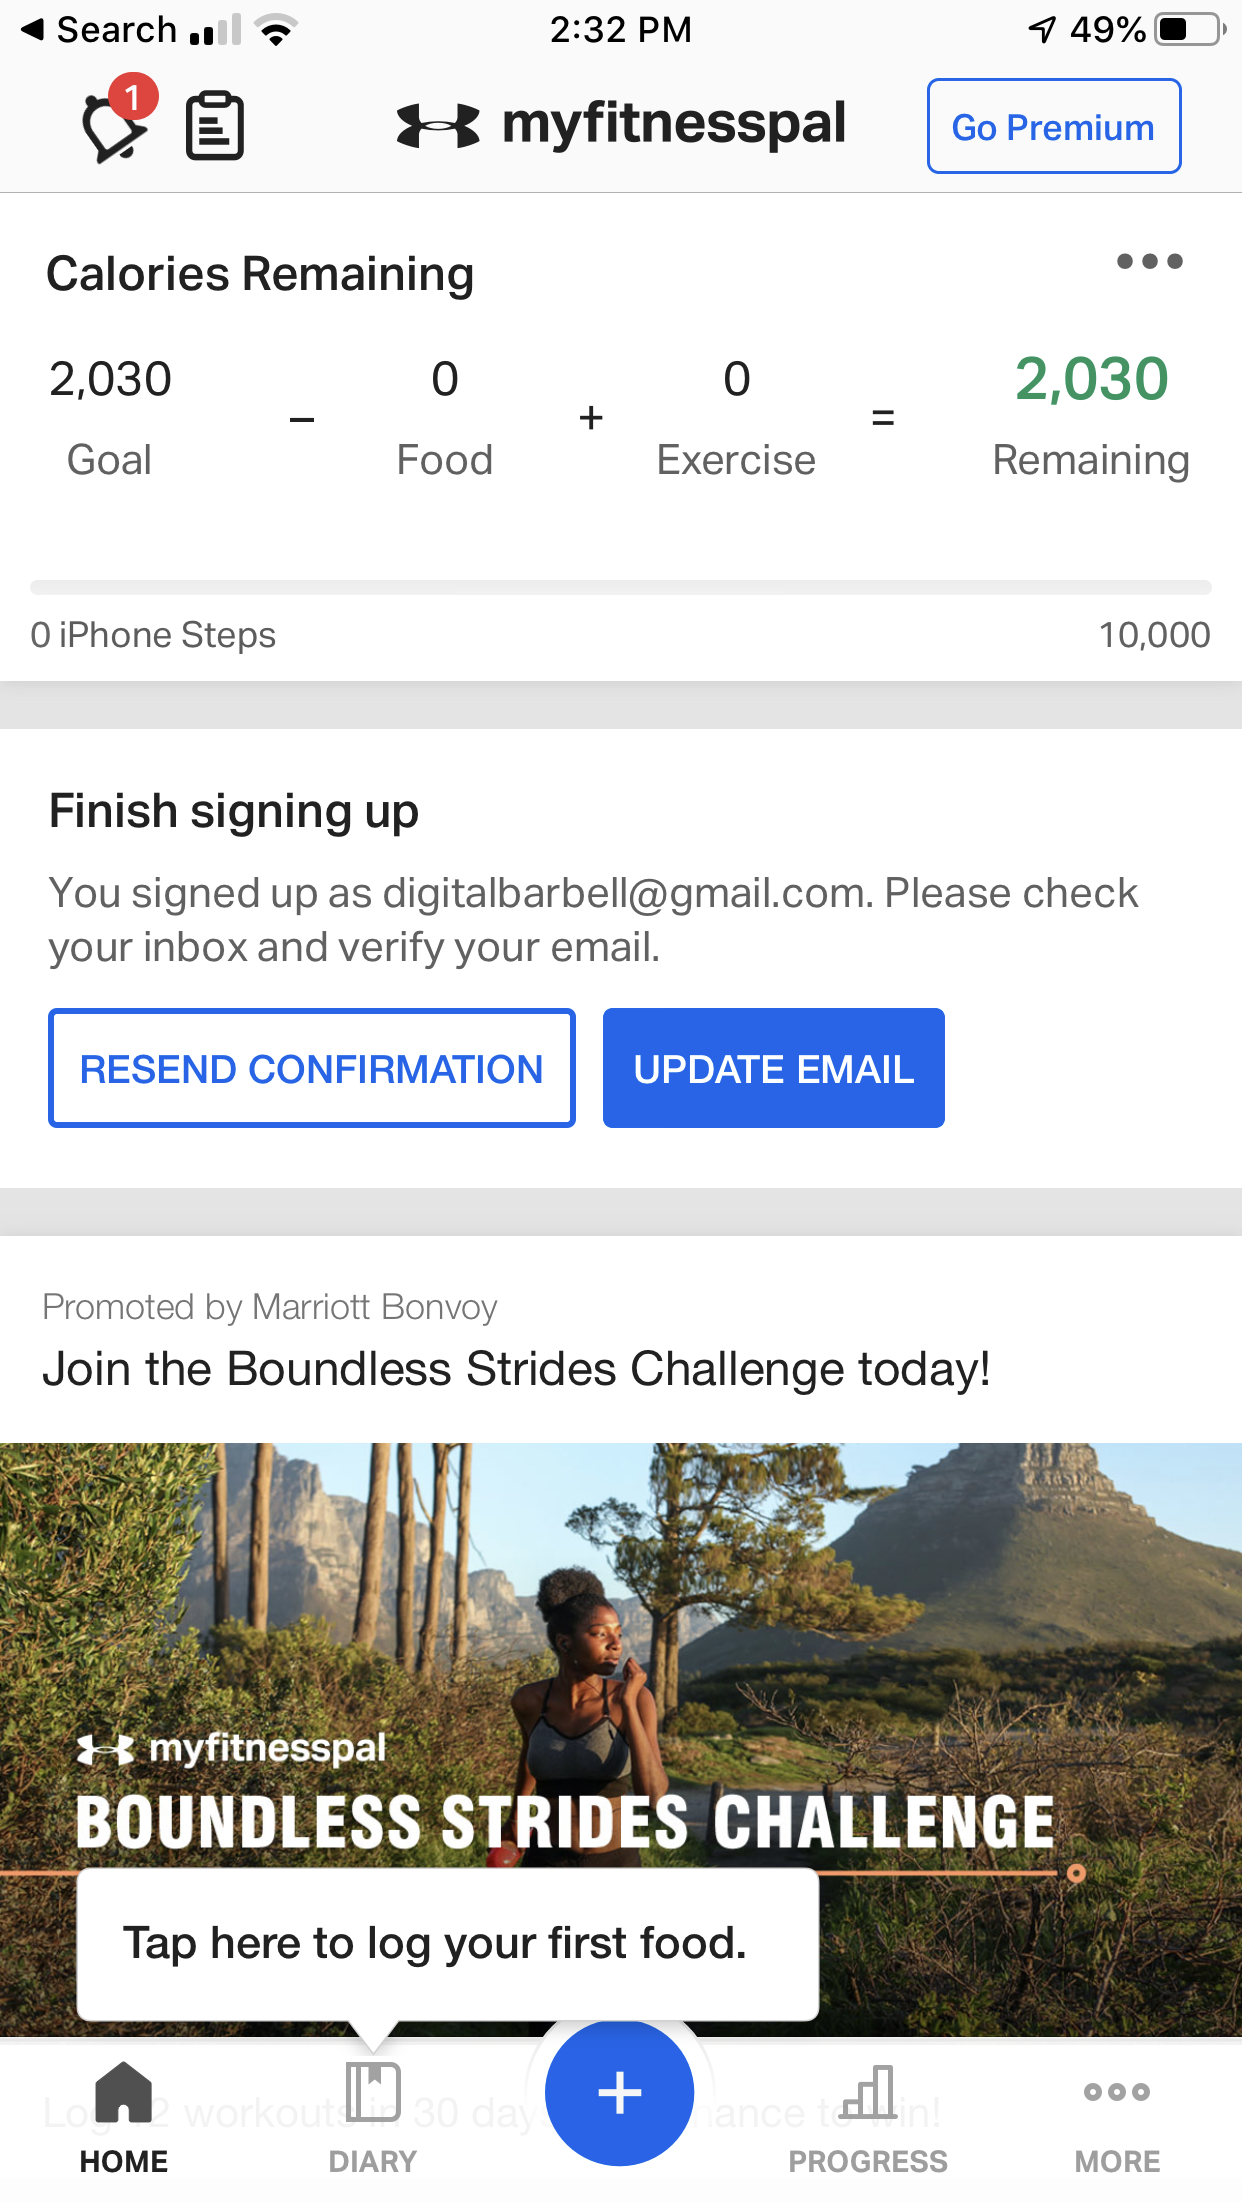
Up top you’ll see your daily calorie goal, the number of calories you’ve eaten that day, the app’s estimate of how many calories you’ve burned that day and then the number of calories left for you to eat that day.
As you log food during the day that “Remaining” will be updated.
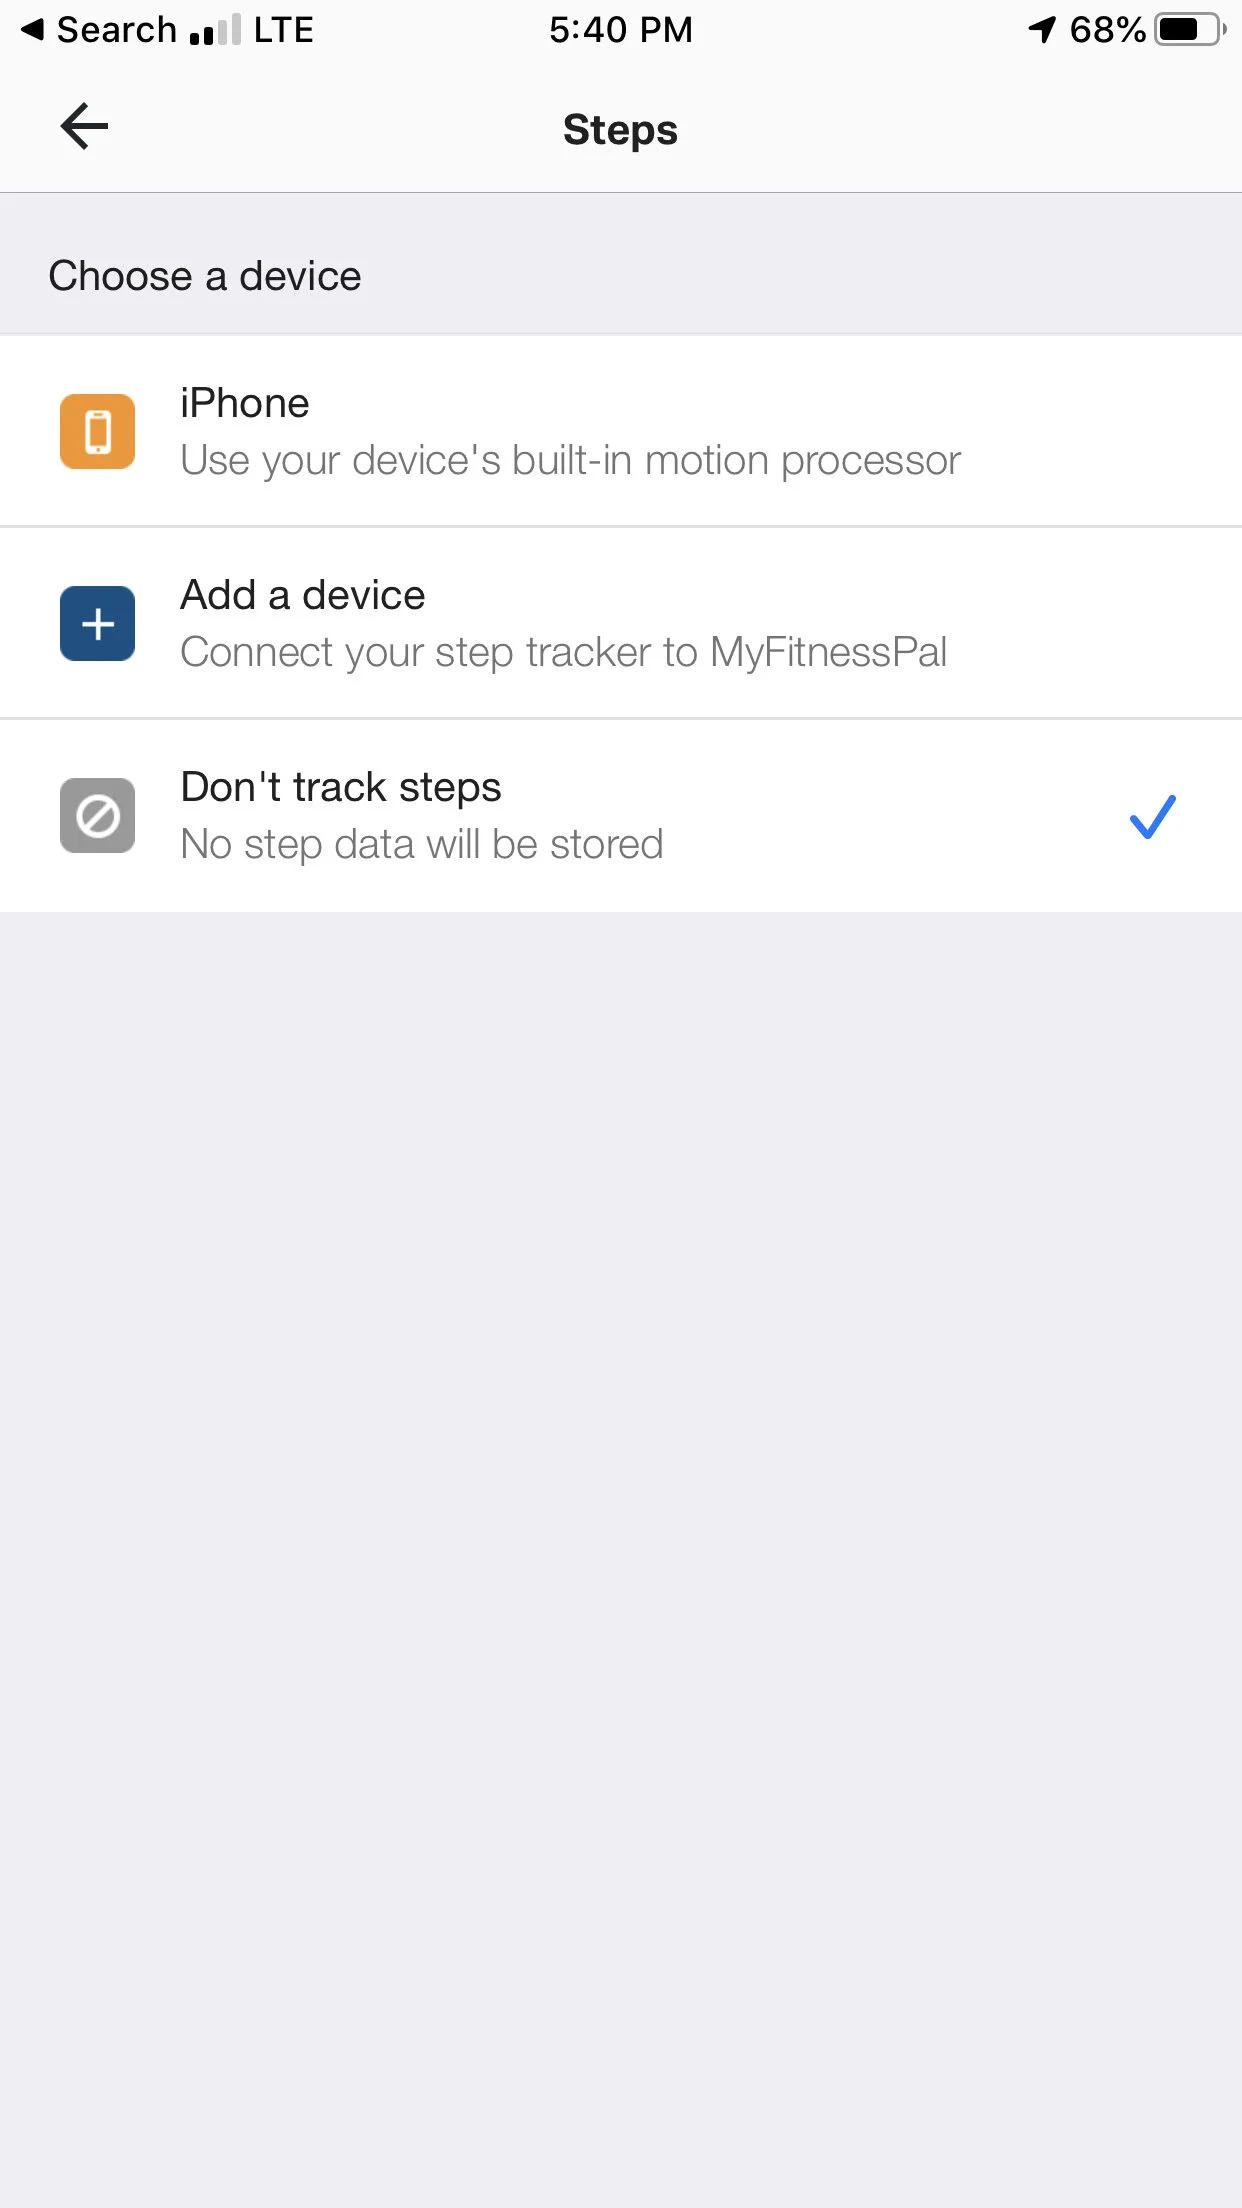
***IMPORTANT INFO HERE: PAY ATTENTION***
Go into your settings,
click on “steps” and
DO NOT allow the app to track your steps or connect to your phone’s activity tracking capabilities.
These trackers are notoriously inaccurate and we recommend you track your daily calories INDEPENDENT of your activity. In other words we want the “exercise” number at the top of your home page to always read zero.
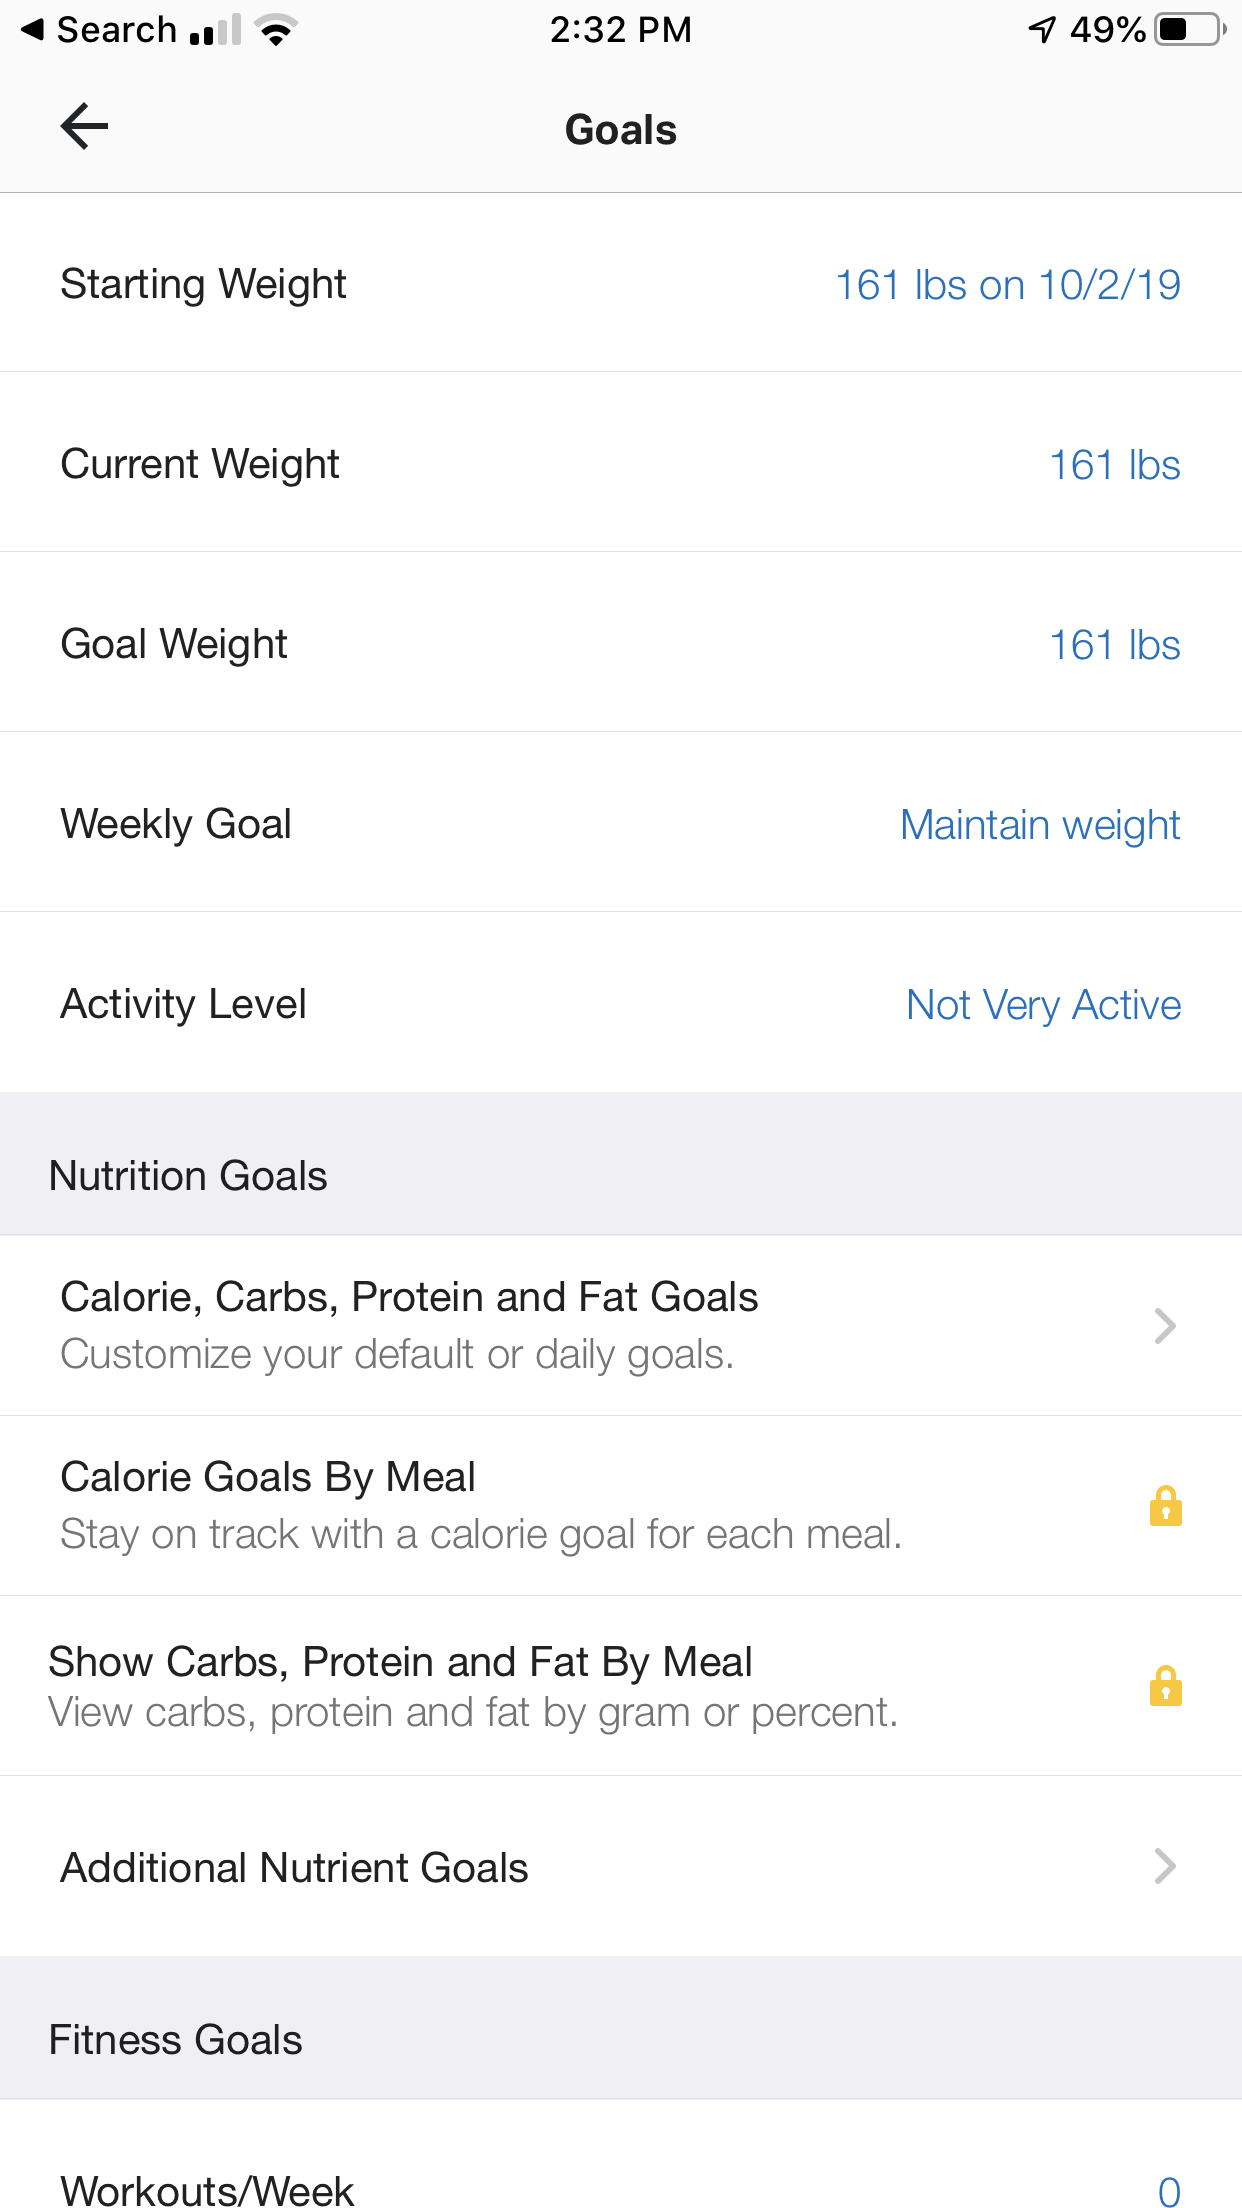
Moving on, go back to your settings and click on “Goals”.
This will bring up the page that shows your weight, weight goal (this should match your current weight), and nutrition goals.
-> Click on “Calorie, Carbs, Protein and Fat goals.
That will open another page where you can adjust your calories, carbs, protein and fat.
It will look like this (but not these exact numbers):
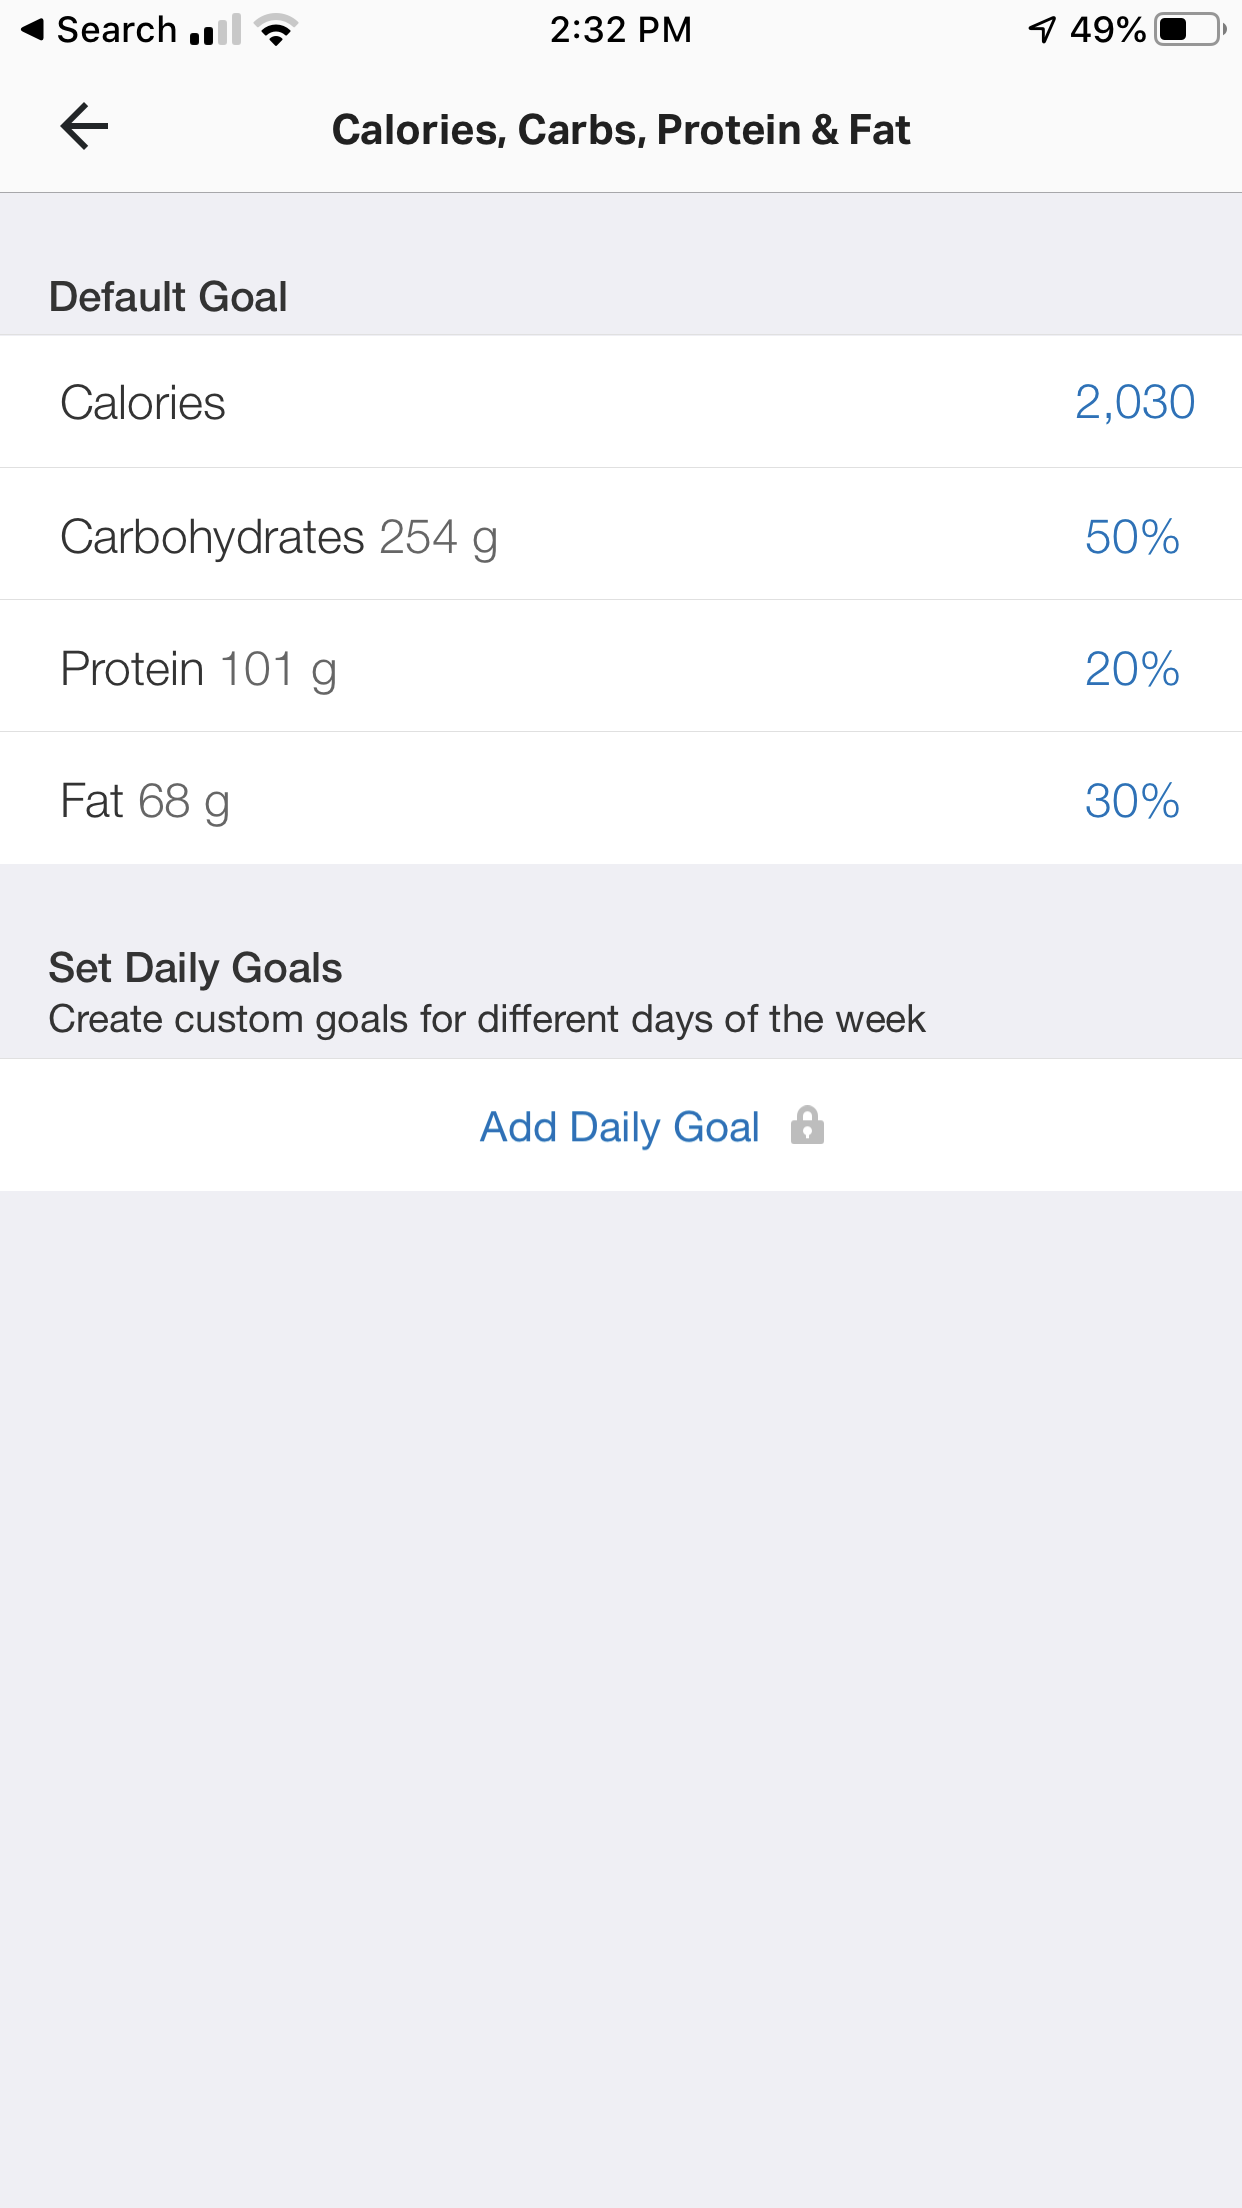
When you click on carbohydrates, protein or fat (you can’t click on calories), a window will pop up with some little wheels that you can spin to make adjustments.
-> This is how you can adjust each macronutrient and in turn change your calorie goal.
Remember, Protein and Carbs have 4 calories per gram and Fat has 9 calories per gram so as you set your number of grams of each that you want to eat per day, your calorie goal will reflect those numbers.
Unfortunately, with the free version of MyFitnessPal you cannot set the exact number of grams of each macronutrient that you want to eat. Instead you have to use the percentage sliders in 5% increments to get as close as you can to your goals. The premium version ($50/year) allows you to set exact goals in grams vs. the percentage system.
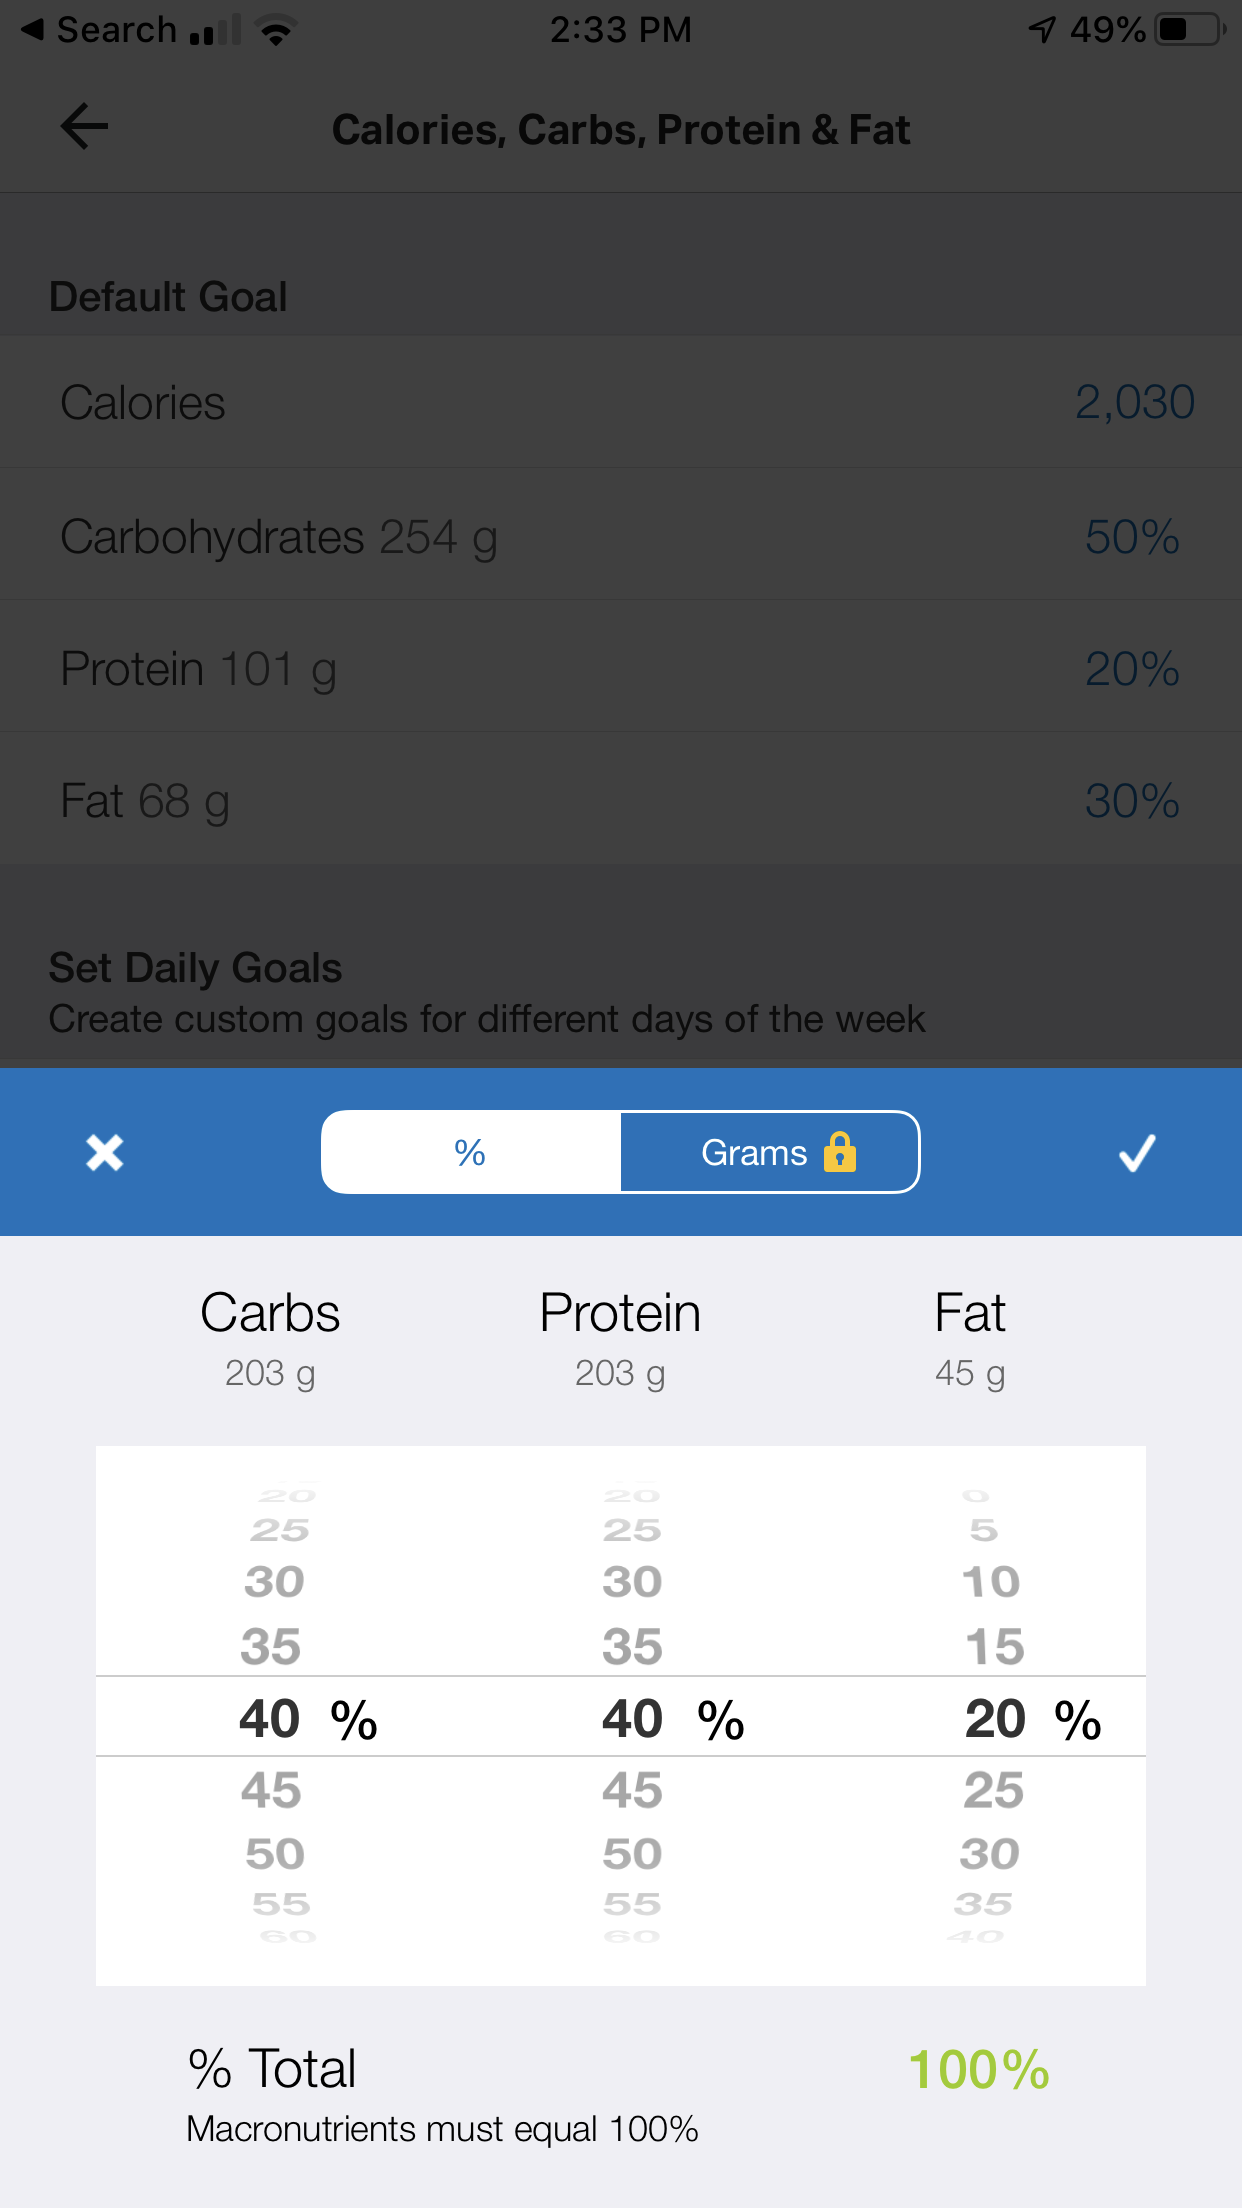
-> Once you’ve got those #’s set, click the check mark and then arrow back to the home page.
Entering your Daily Food Consumption
There are two main ways for you to start entering your food for the day into the app.
You can click the blue plus sign at the bottom and then select “food” and select which meal or snack you’re eating, or you can click on “diary” just to the left of the plus sign. If you pick “diary” you’ll come to your daily log where you’ll select the meal that you’d like to log.
Ok, let’s log some grub.
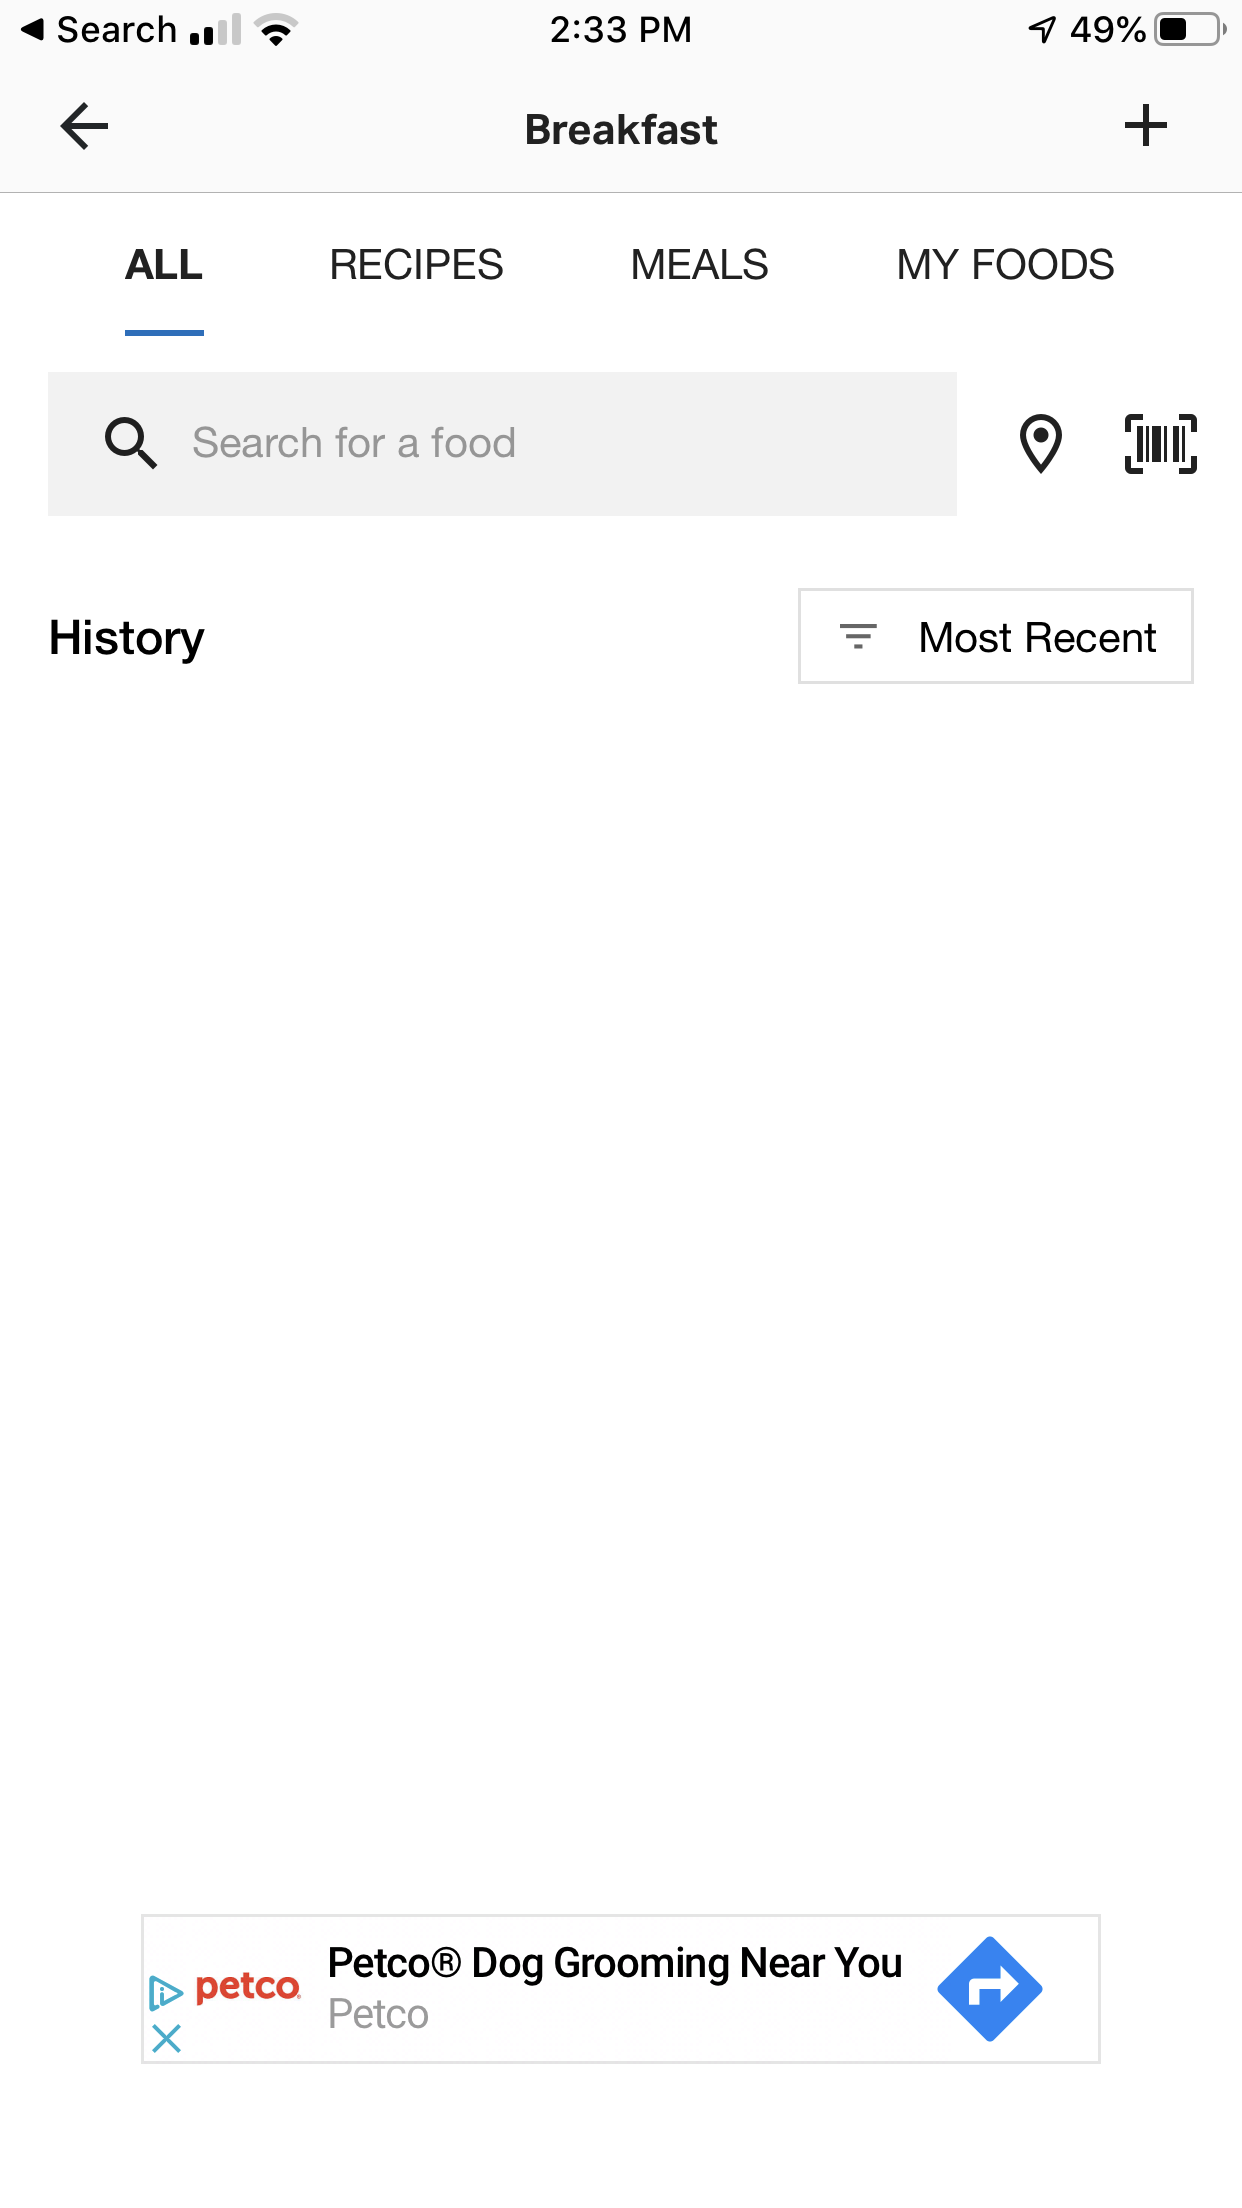
Click on “Breakfast”.
You’ll come to the search screen where you’ll be able to search for food that has already been entered into the app with the nutritional info attached.
Let’s search for some eggs. I’m having large eggs so I typed “Egg large”.
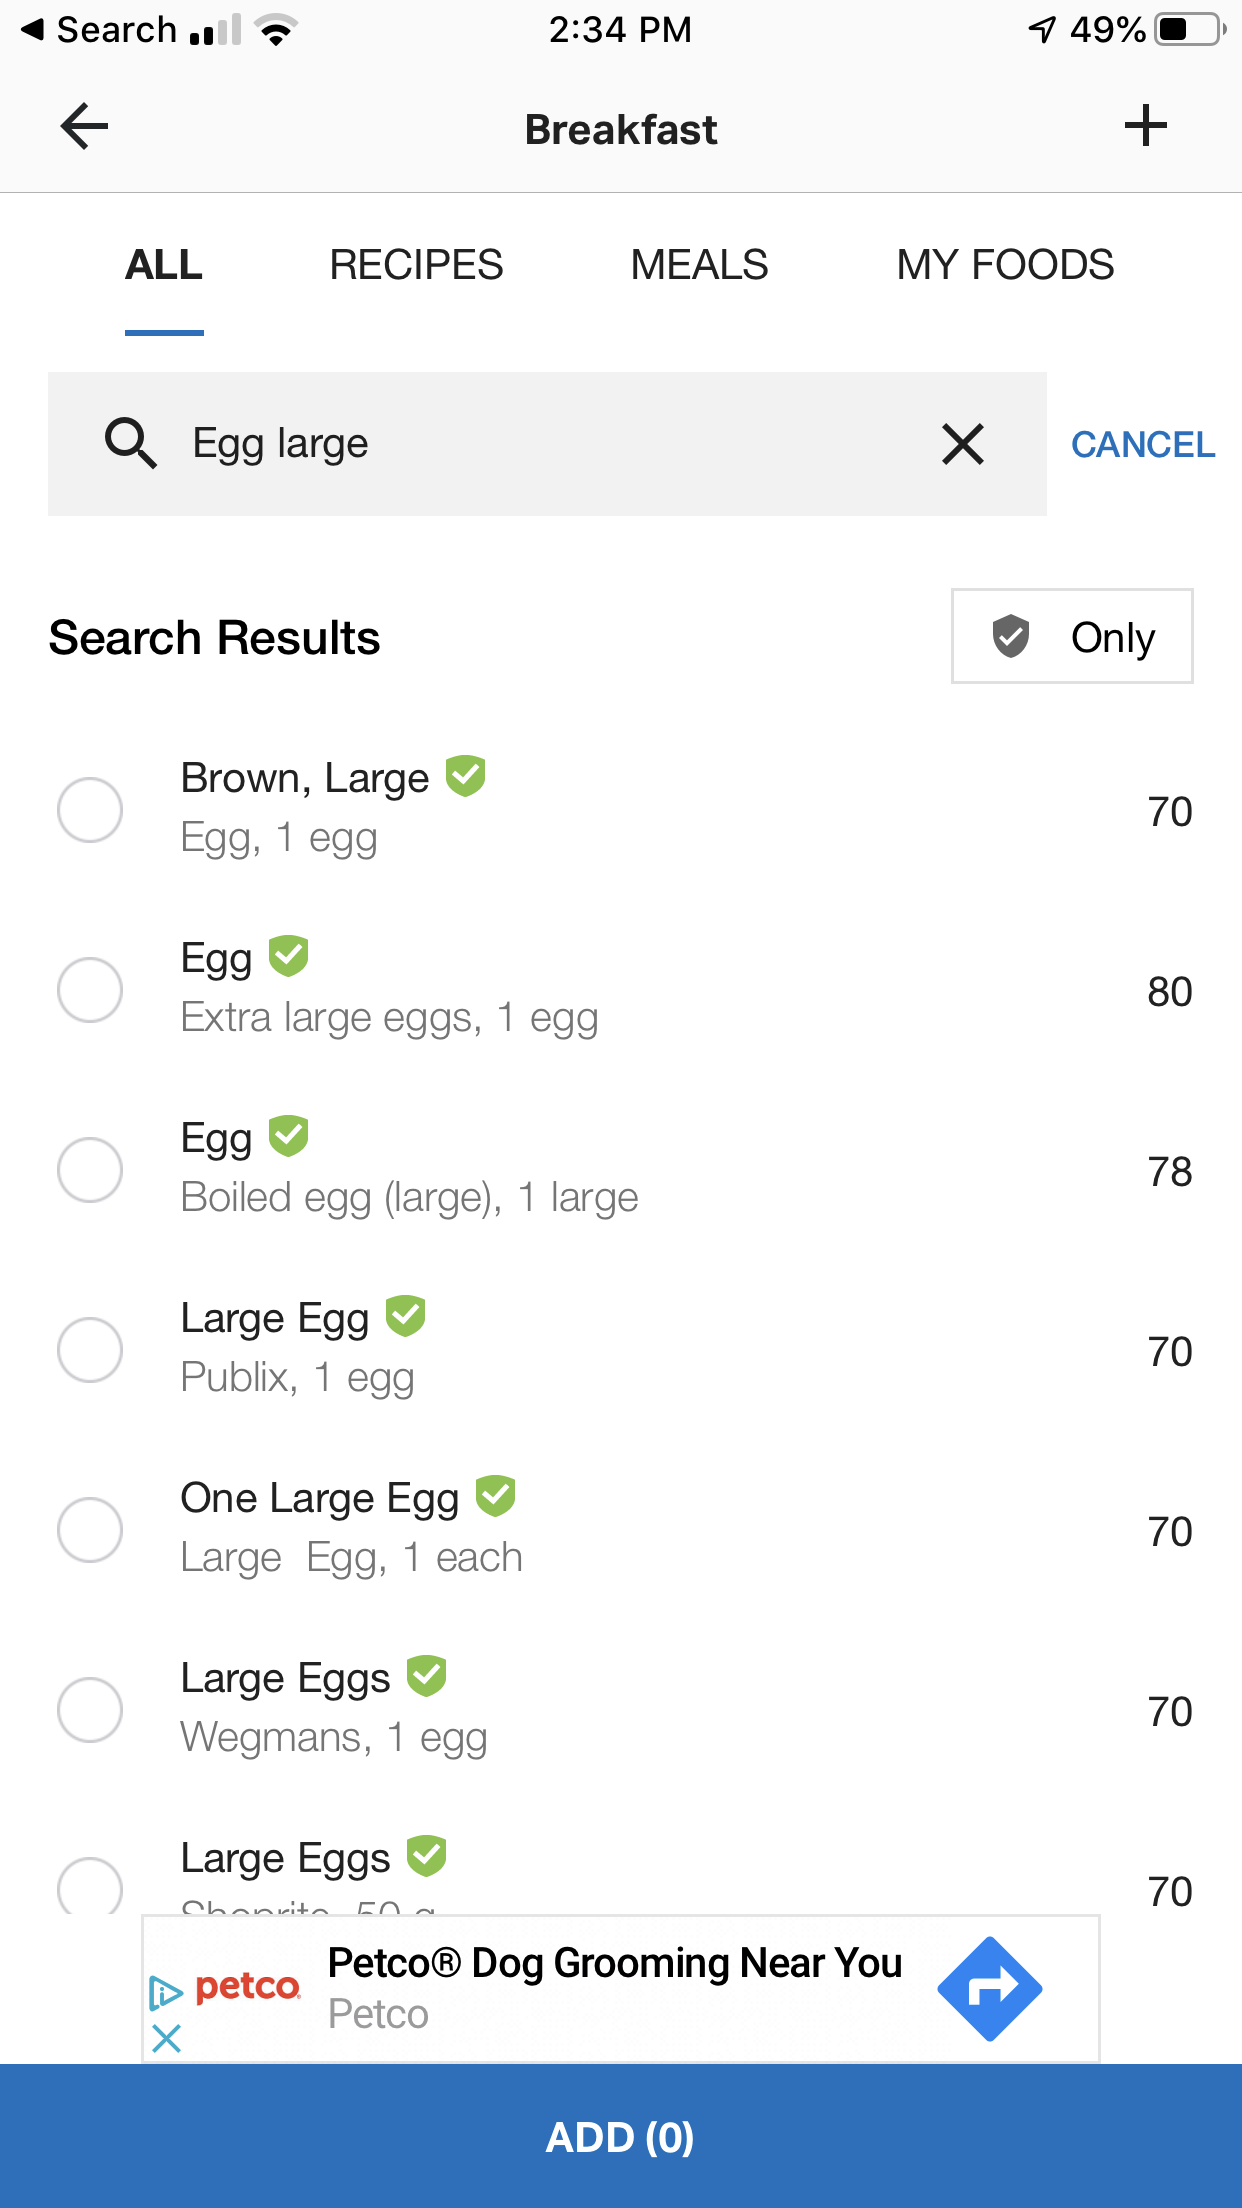
***HERE’S WHERE PEOPLE OFTEN GO WRONG***
-> Don’t just pick the first thing that you see.
Scroll through the list and look for consistency, AND look for food entries with actual protein, carbohydrates and fat numbers (some entries only contain calories).
You can also actually compare the entry to your food label this once as a spot check. Look for the entries with the green check marks as they are usually much more accurate.
Ok, I picked the first entry.
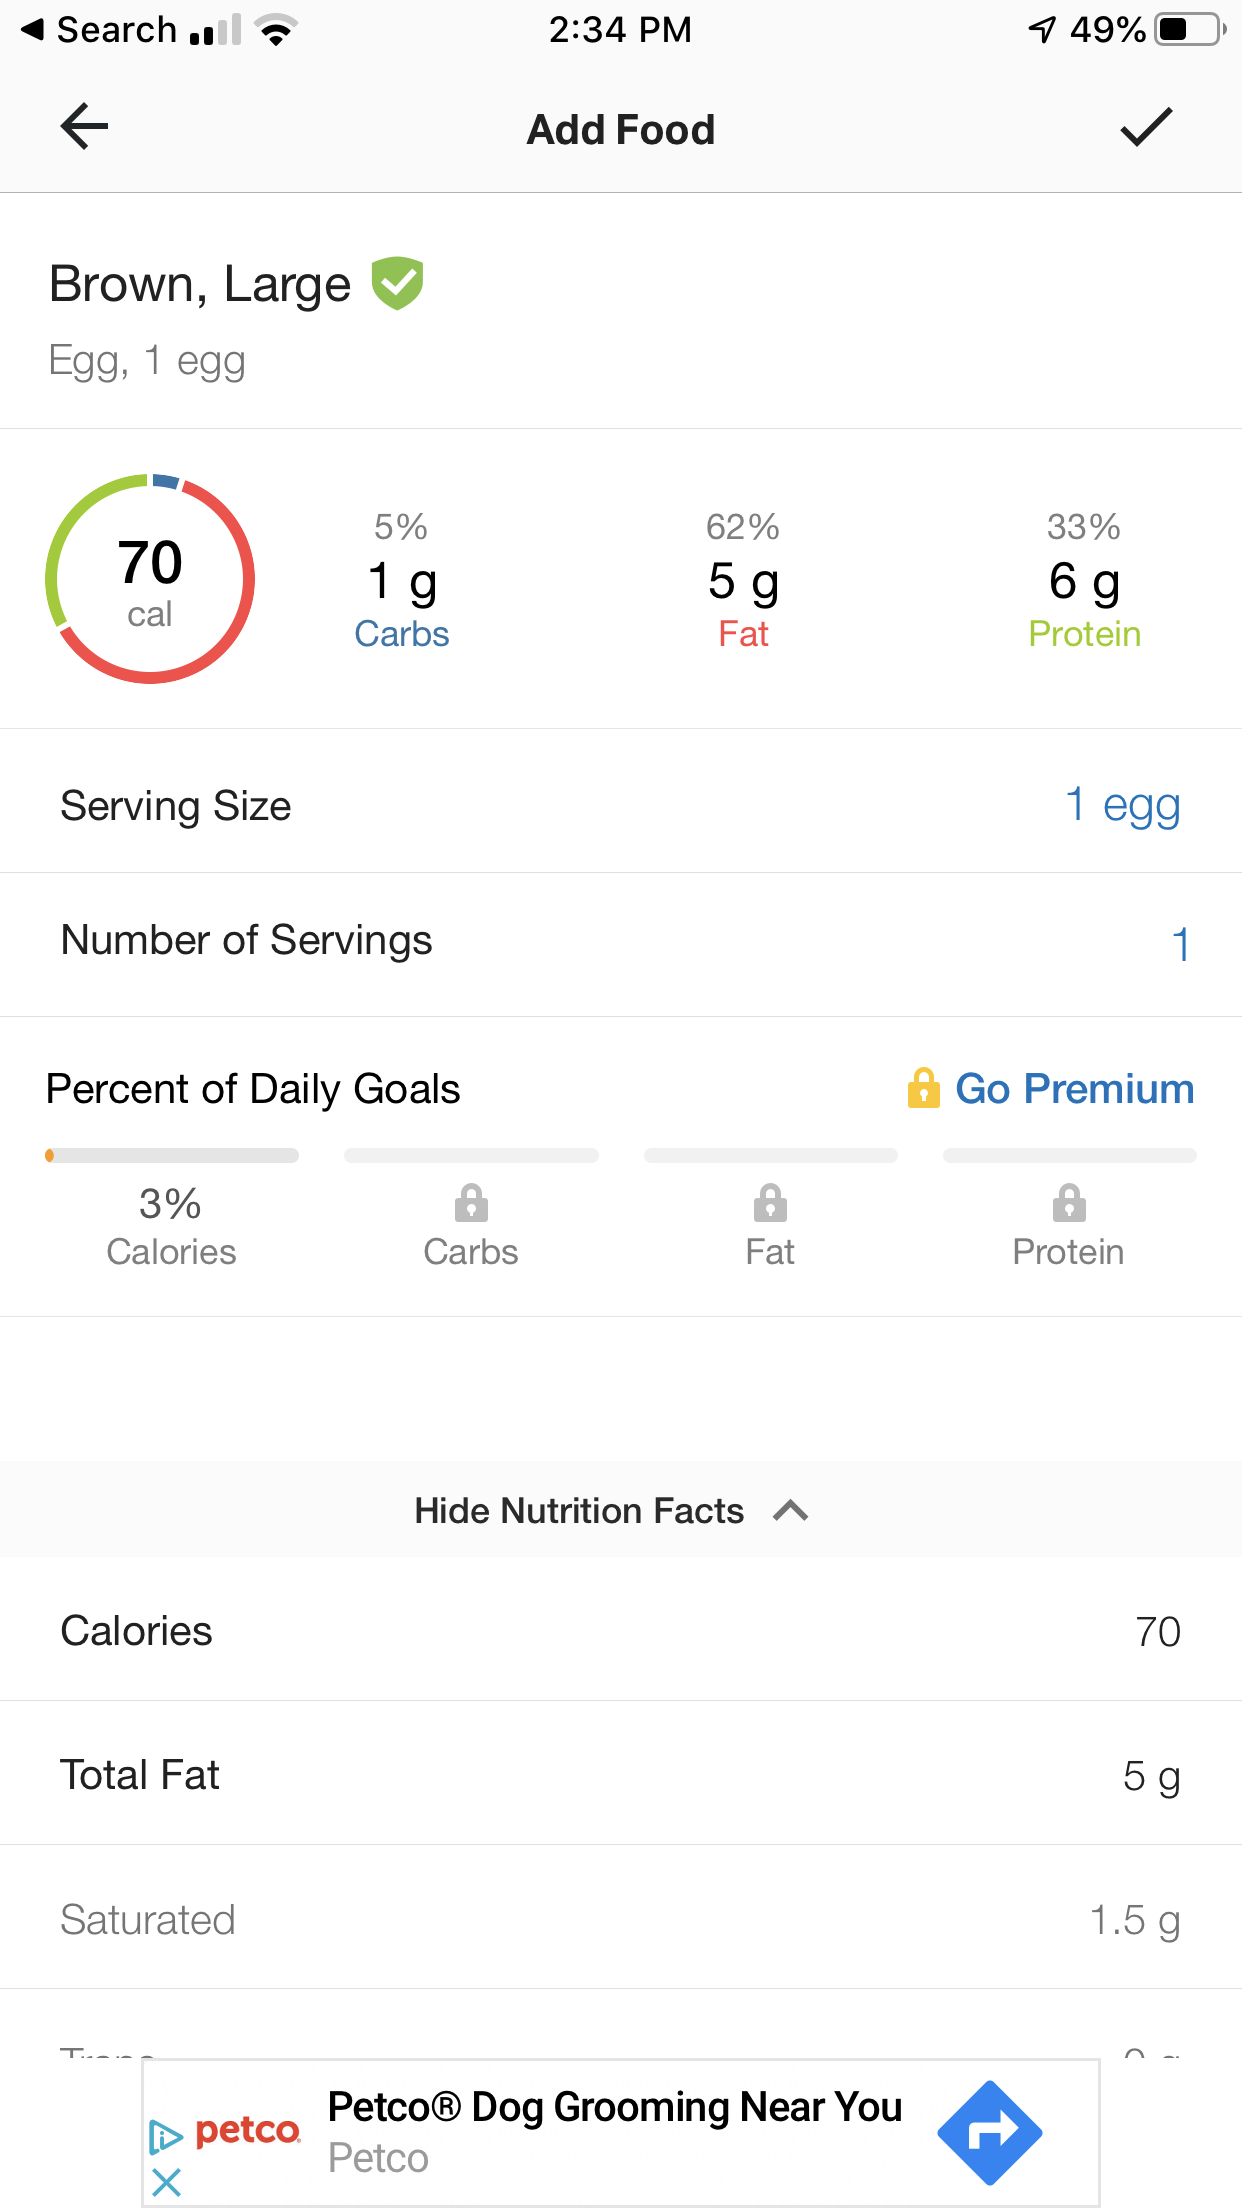
Notice how when I selected it, it defaulted the “Serving Size” to 1 and the “Number of Servings” to 1?
***THIS IS ANOTHER AREA WHERE PEOPLE SLIP UP***
-> Make sure to input the actual serving size or quantity that you had each time you log.
These will be the fields that you adjust to actually get things logged accurately.
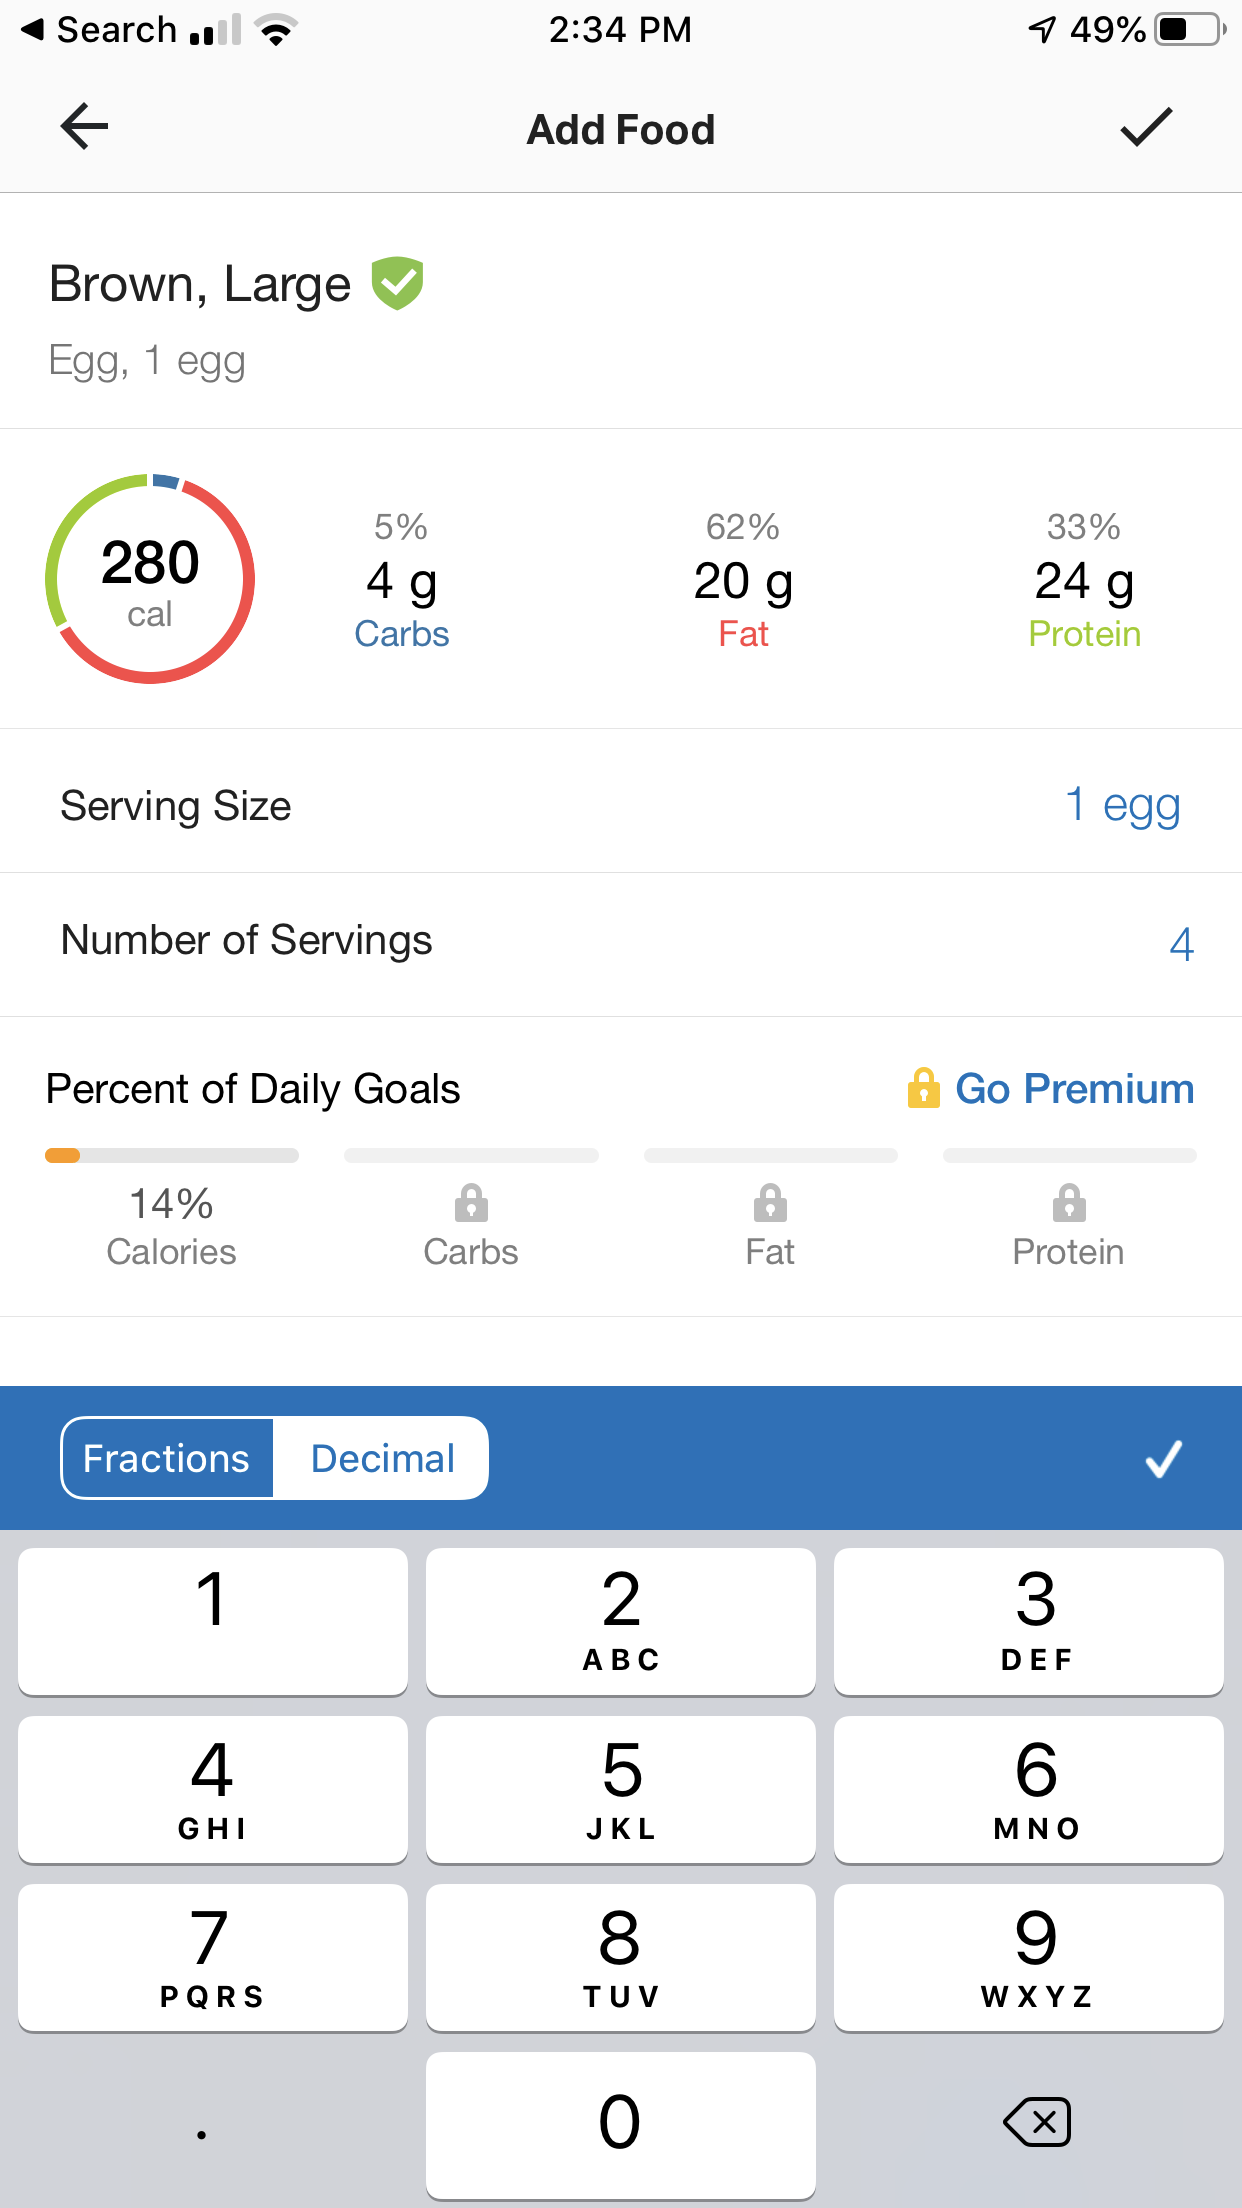
I had 4 eggs for breakfast, so I need to click on the “Number of Servings” field to adjust that.
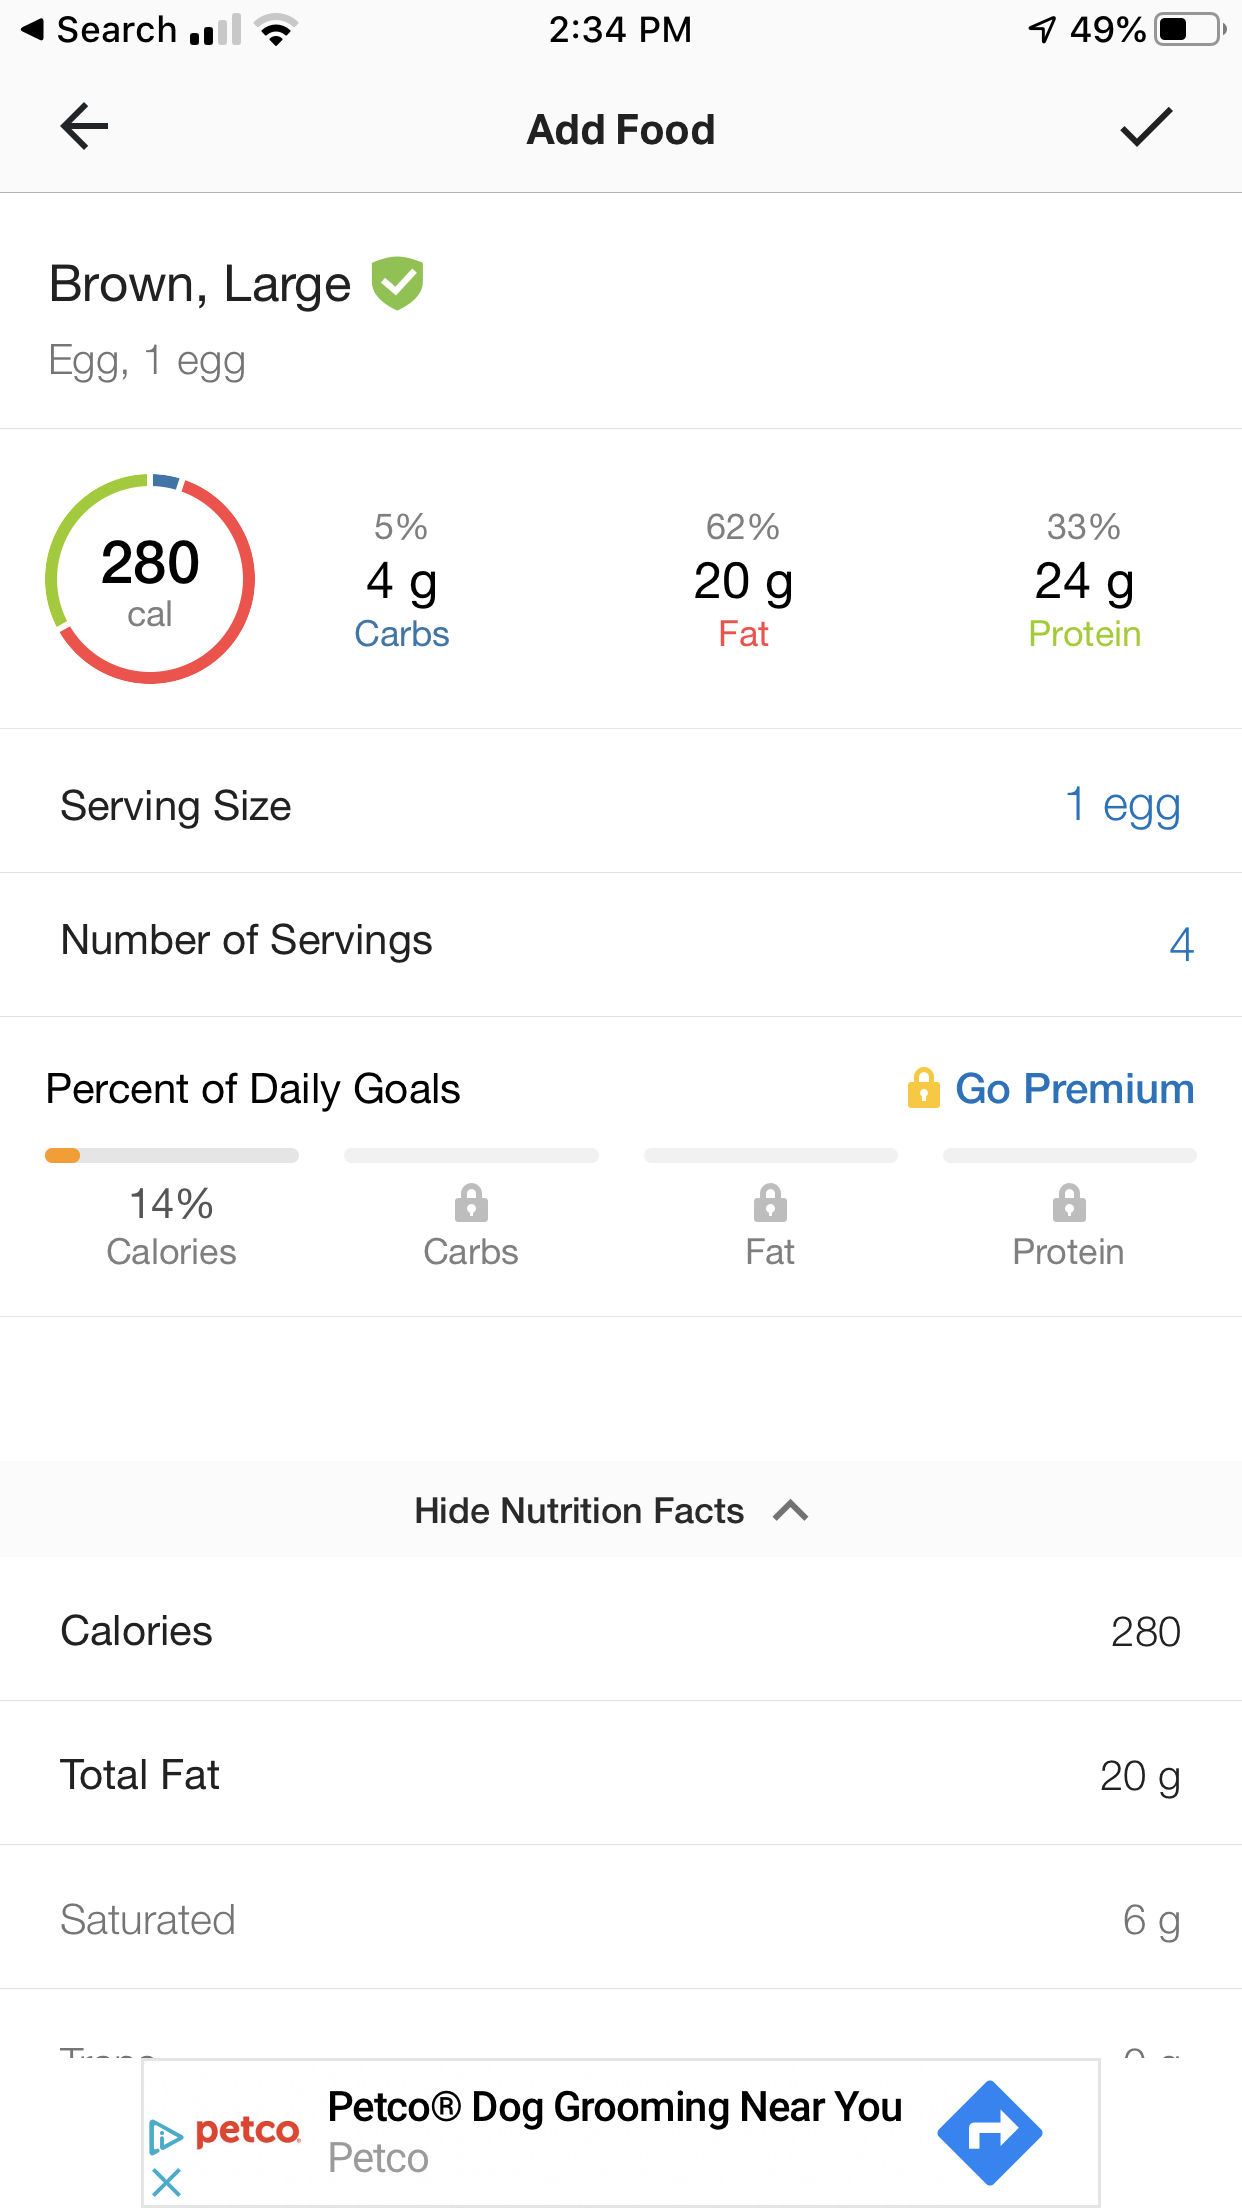
There, now I have 4 eggs logged instead of just 1.
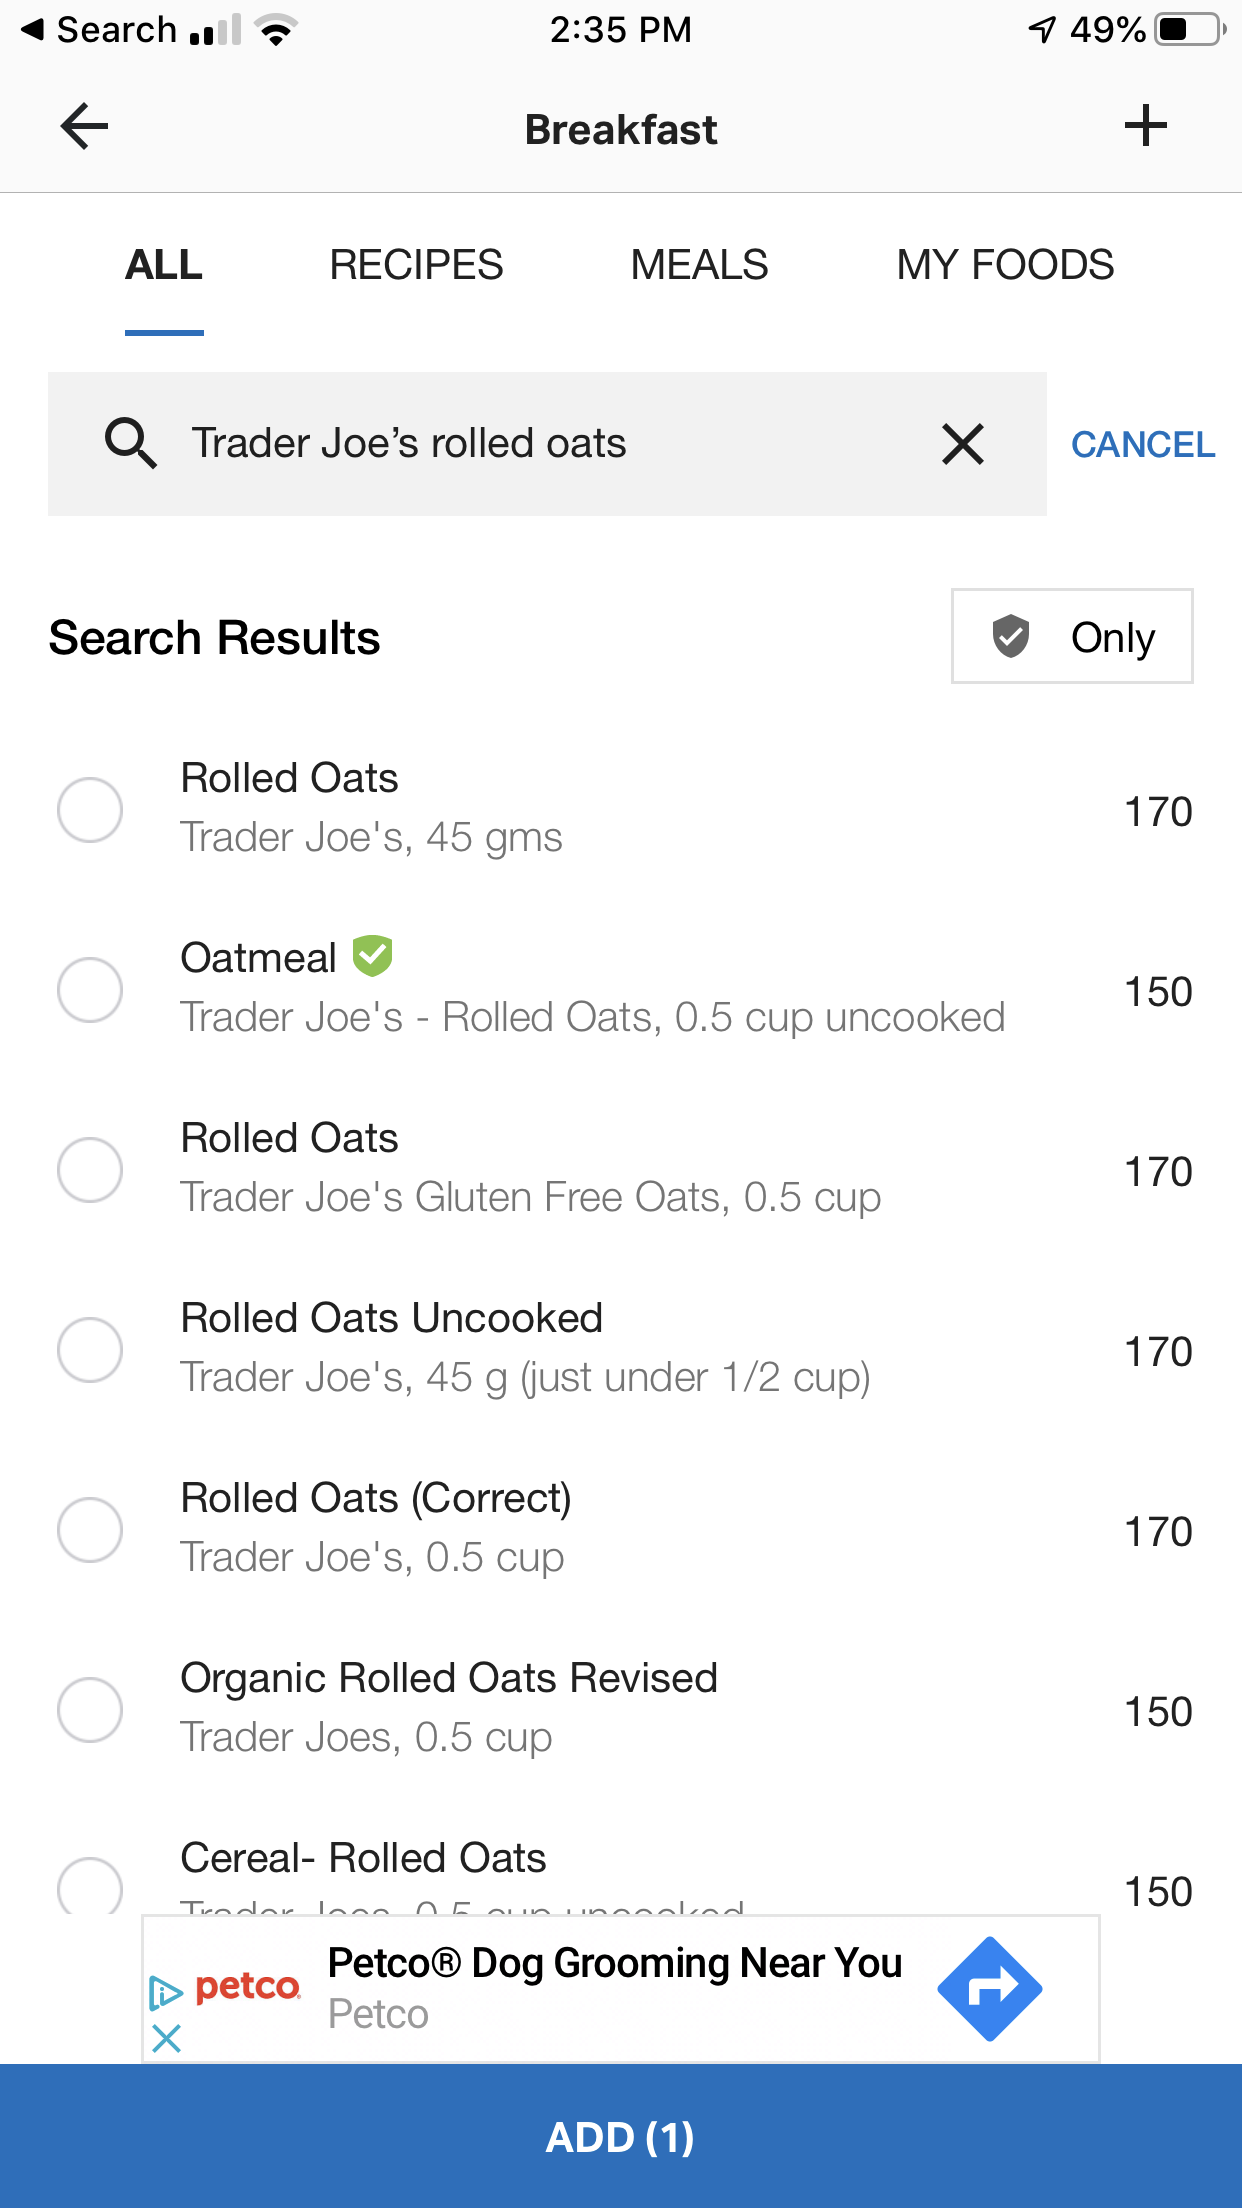
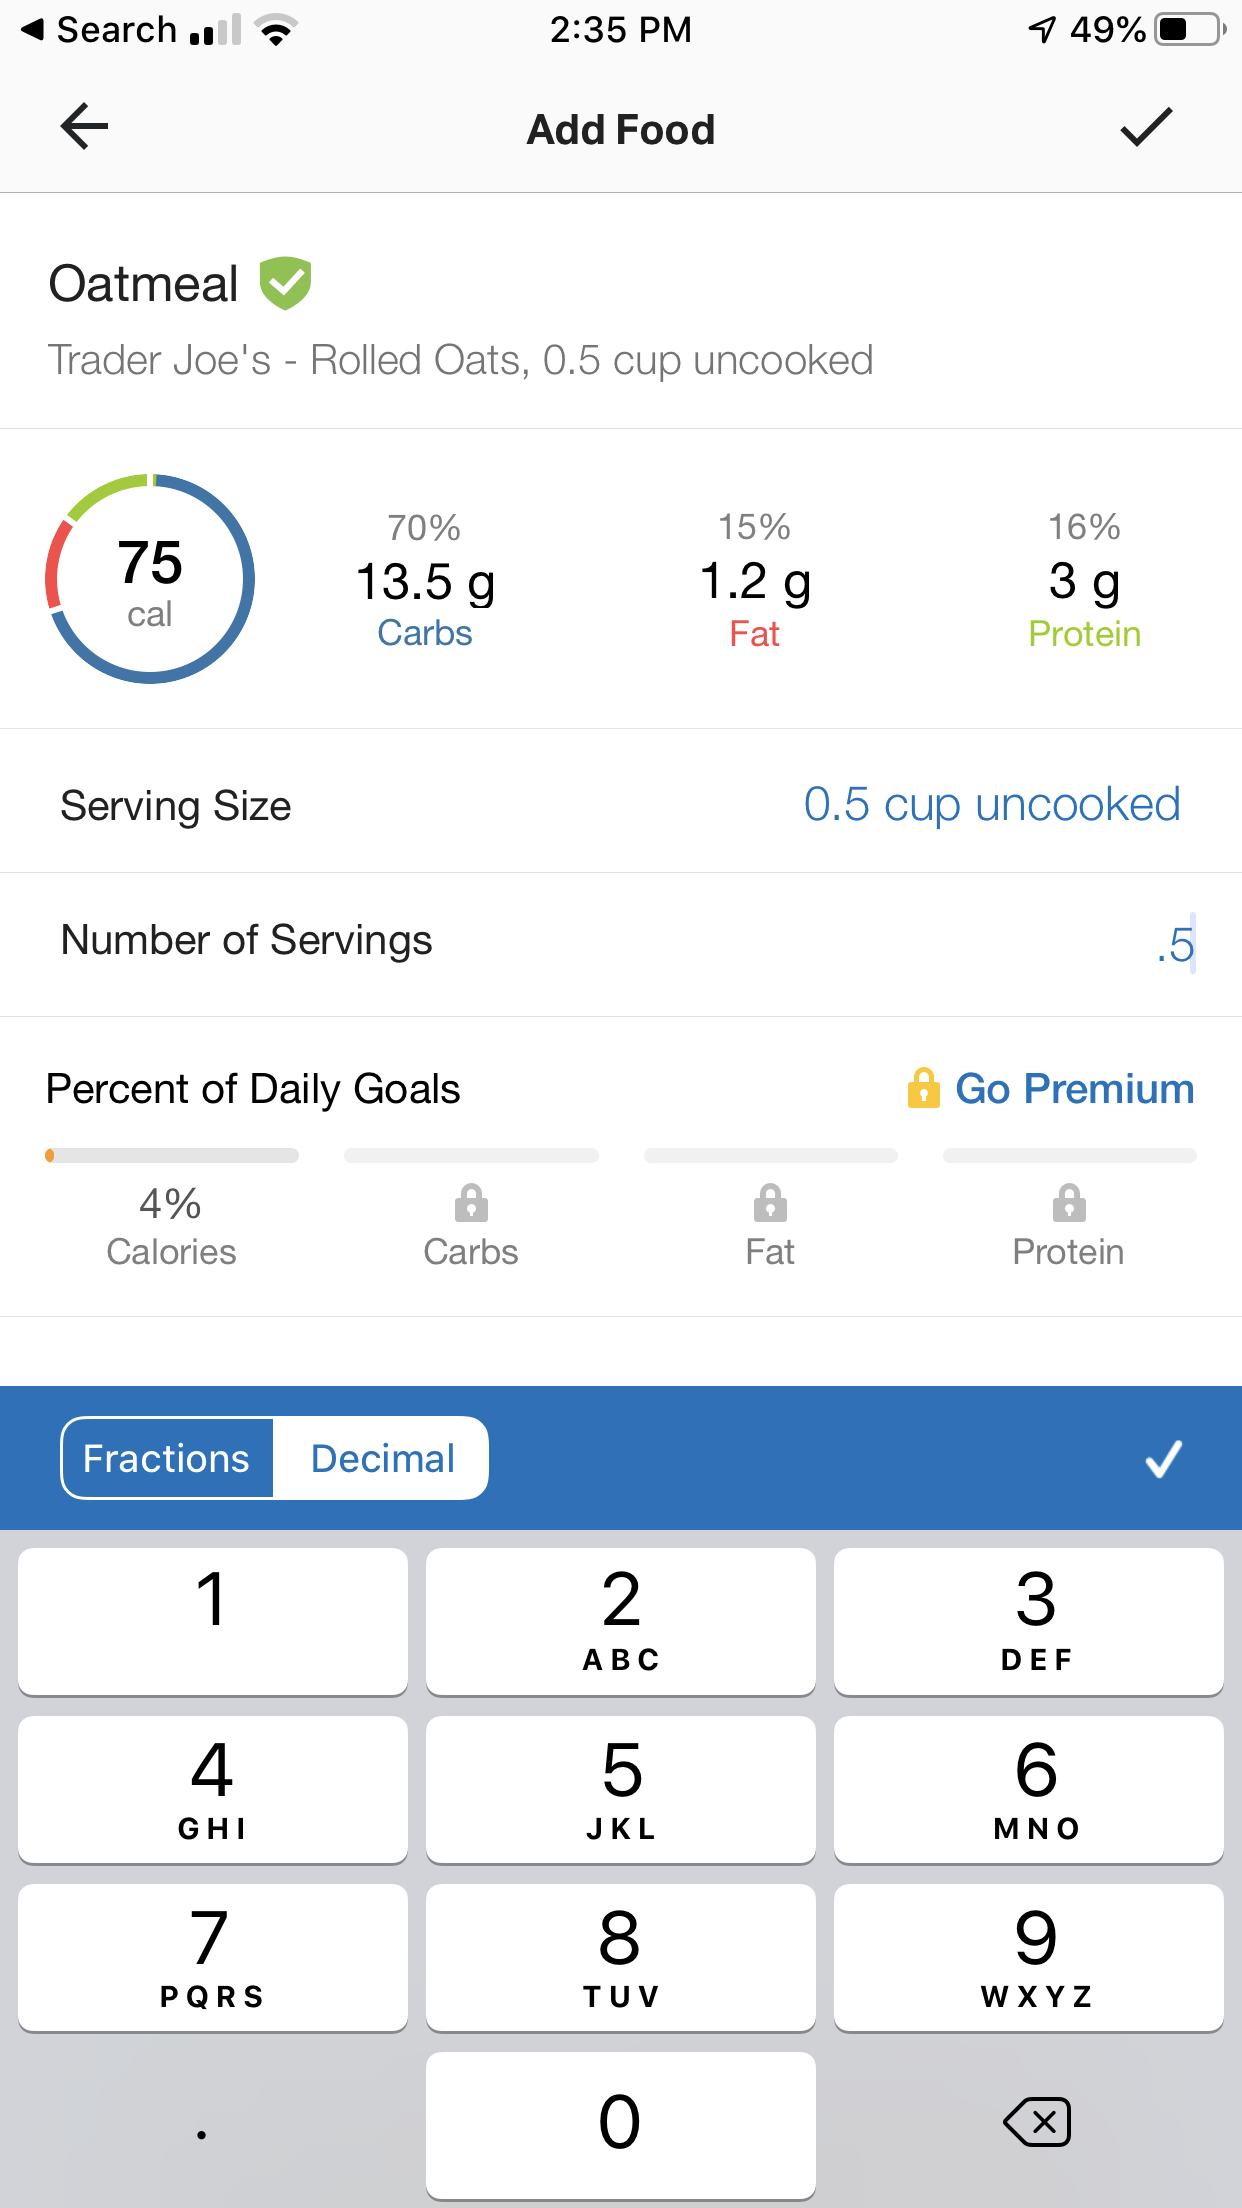
Ok, I also had 1/2 of a serving of Trader Joes Oatmeal so let’s log that.
Back in the search box, I put in some specifics.
There it is, second on the list. I clicked on it, but it defaulted the serving size to 1. Remember that I said I only had 1/2 of a serving? Gotta fix that!
Ok, click the check mark and look at the bottom of the screen for the option to “ADD 2” to your diary. That’s the eggs and the oatmeal.
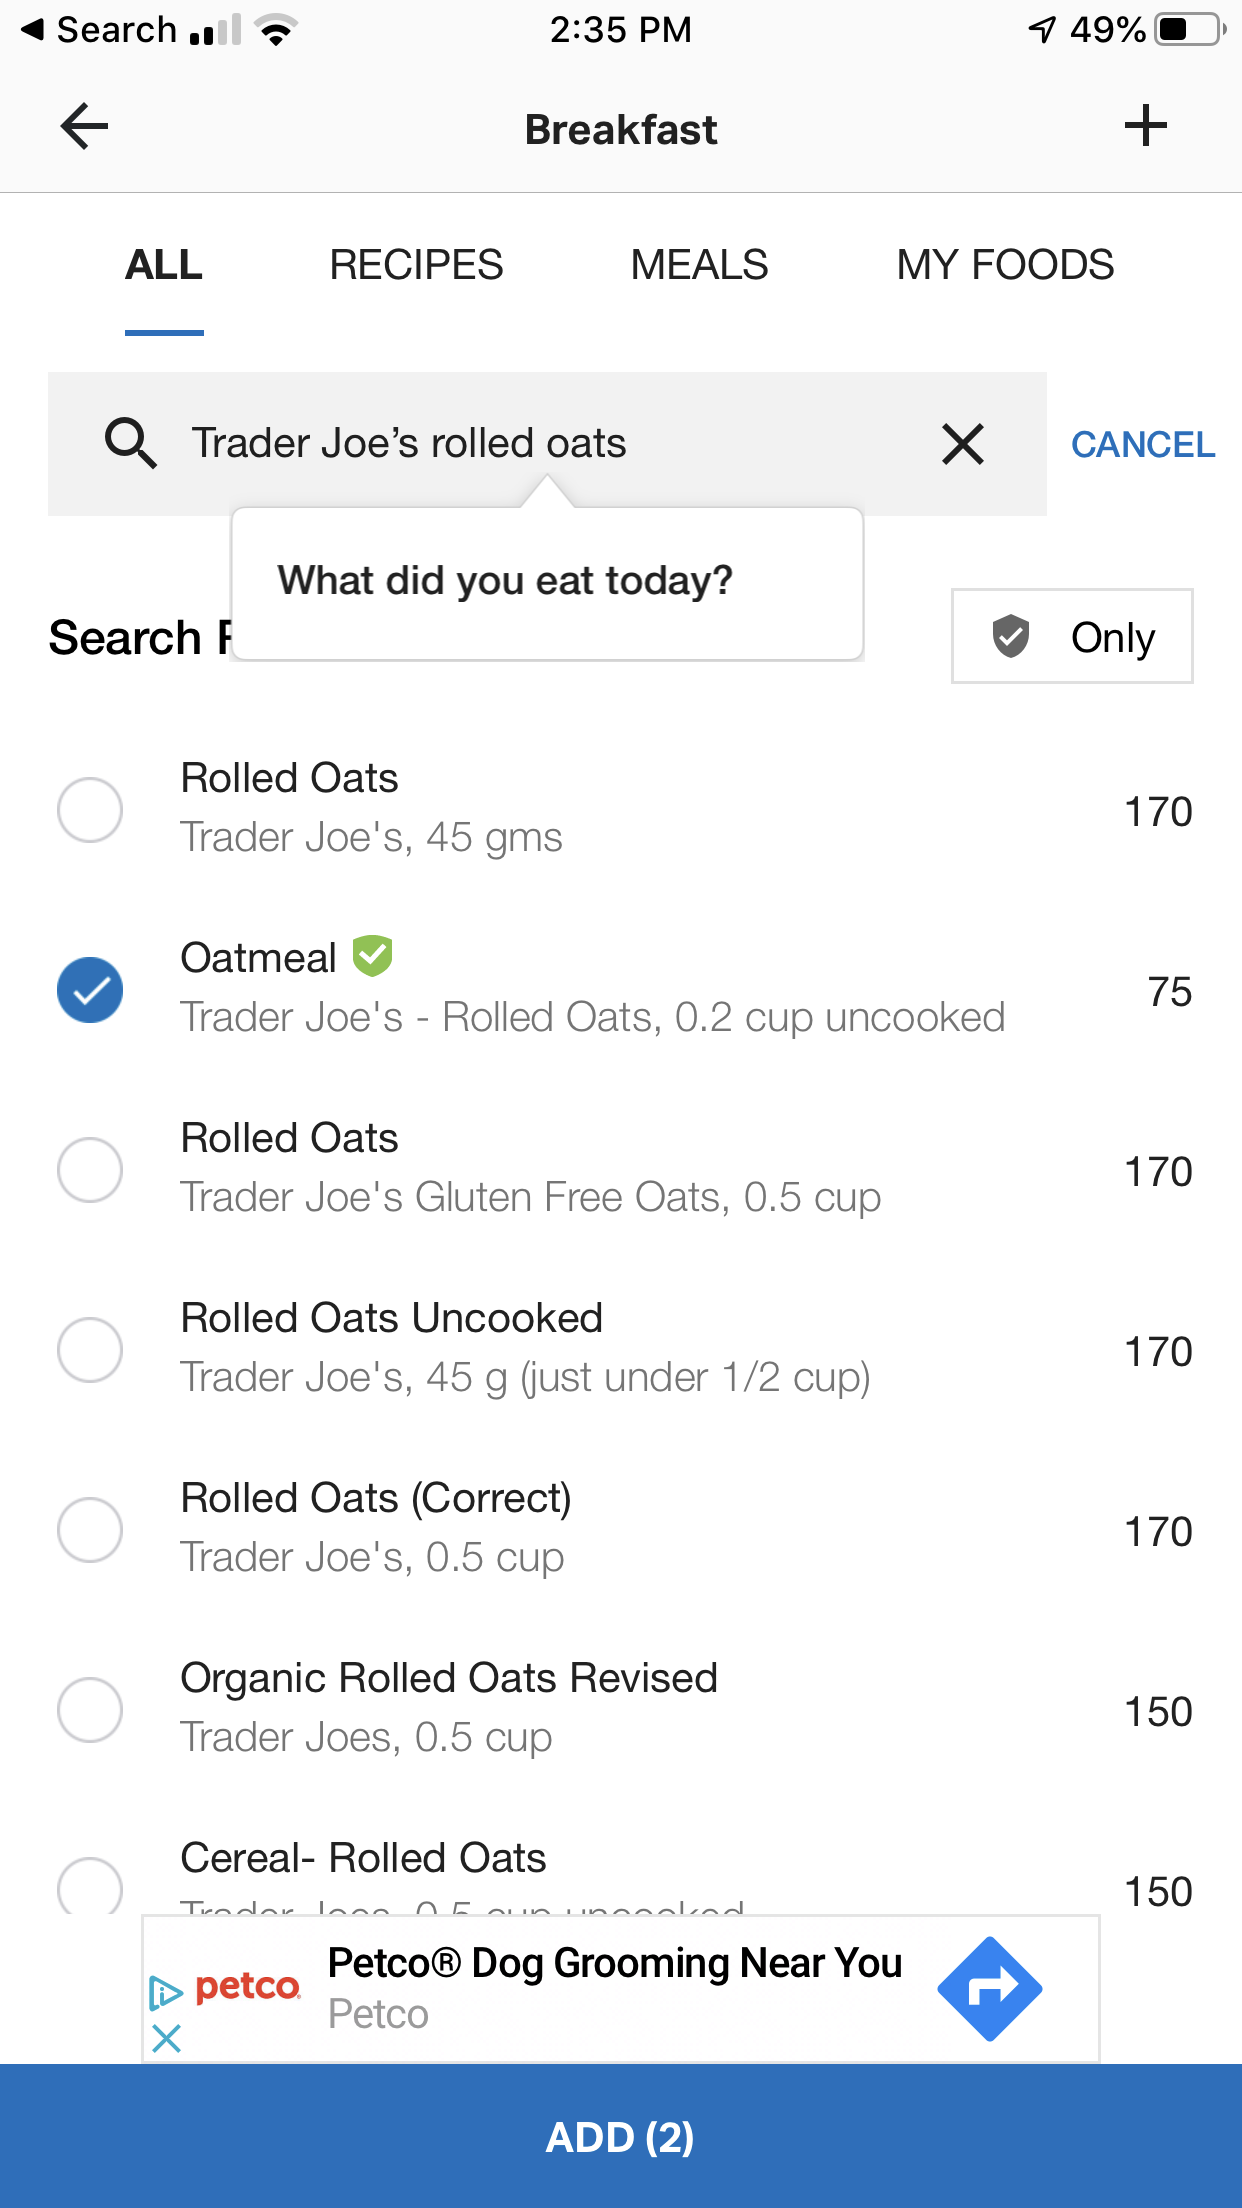
BOOM! Well done! You just entered your first meal!
We won’t go through a whole other meal of logging but I want to give you a couple more tips to set yourself up for success.
Tips for Logging Success
Weigh as much of your food in grams and oz as you can.
Try not to use measuring cups and teaspoons and tablespoons. They are horribly inaccurate. Like as much as 10-20%, and that can be a deal breaker when it comes to fat loss.
Decide if you are going to weigh your food before or after cooked and then search for entries that match that. For example: We weigh our meat AFTER we cook it so here is the entry we use for chicken breast:
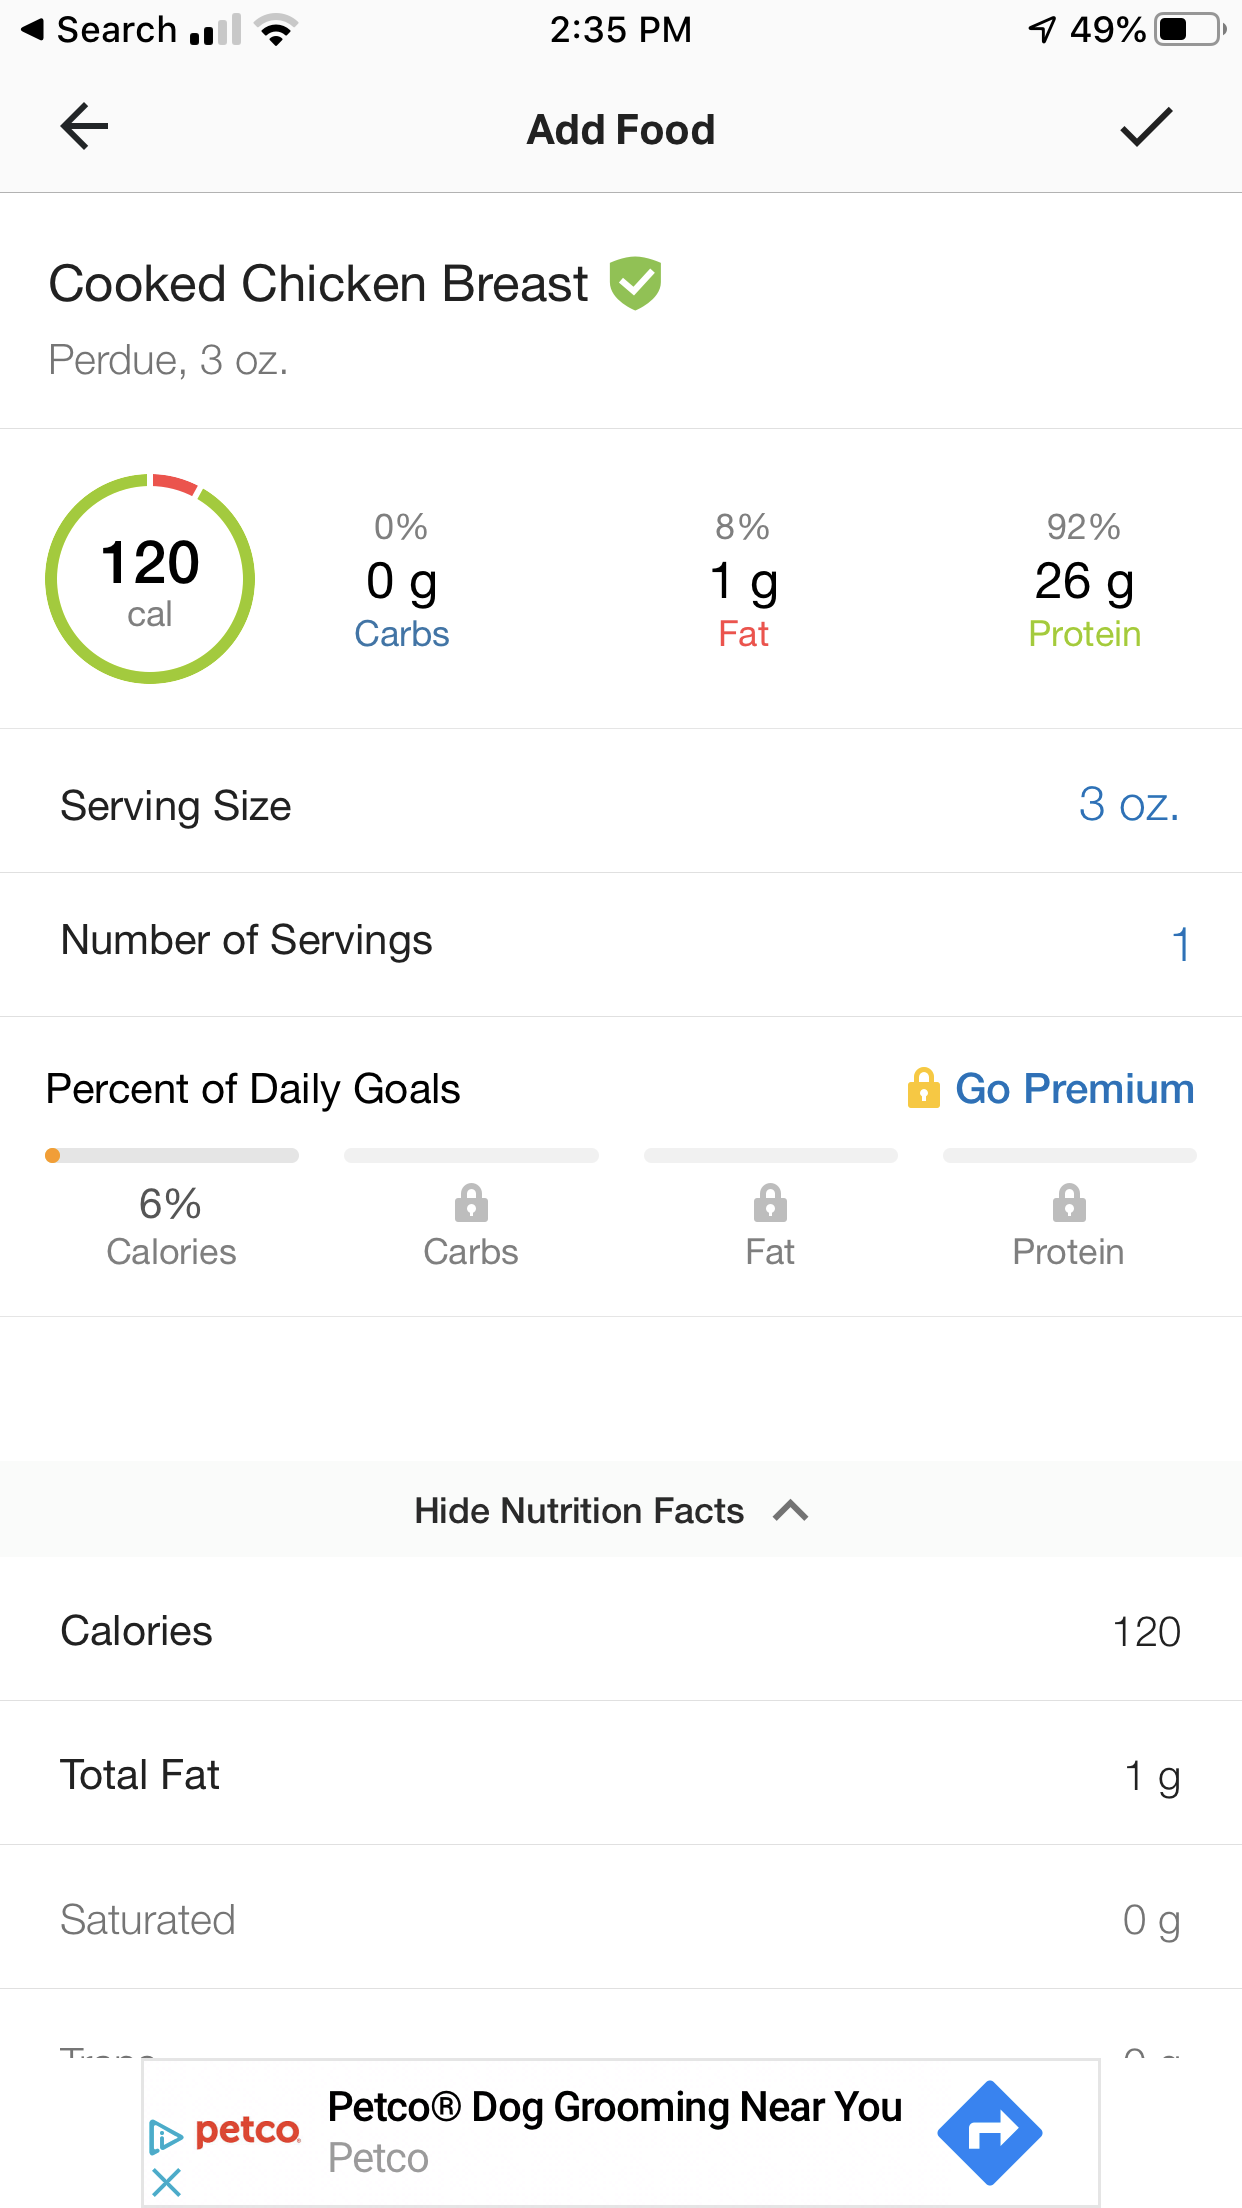
Notice above how this particular entry defaulted the serving size to 3oz. That doesn’t work for me very well because I don’t often eat in 3oz increments and I don’t want to break out my calculator to get this truck meat logged. So I grab that serving size field and change the serving size to “1 oz”.
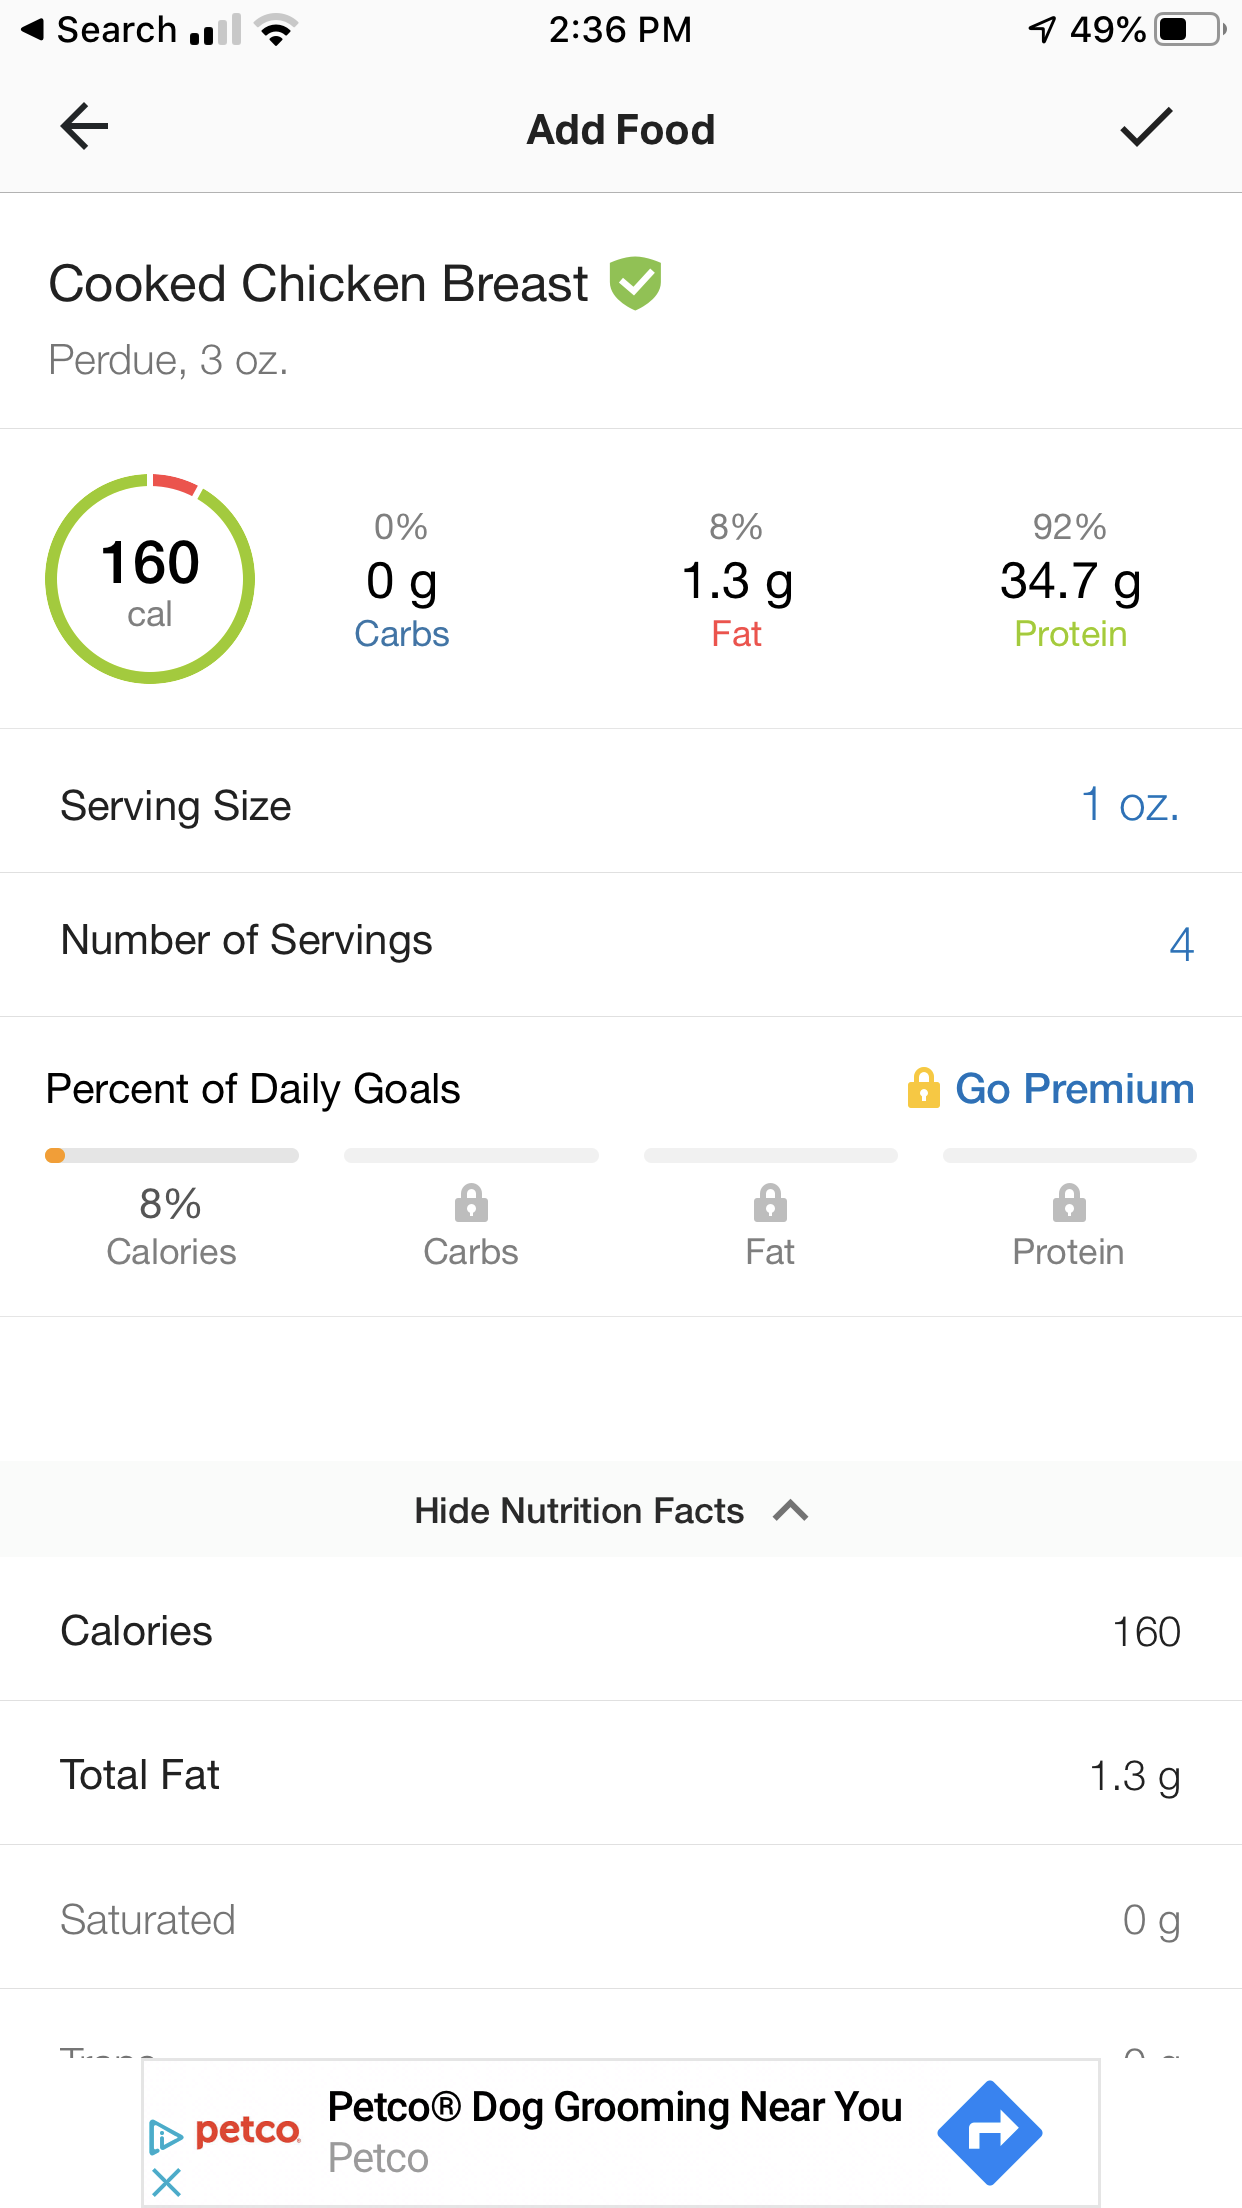
Now, I got lucky on this entry. NOT EVERY food will have the serving size you’re looking for to make your life easier. You might have to hunt around the first time. The good news is that the app does a good job remembering what you’ve logged in the past and suggests it for you in the future.
After I changed that serving size to 1 oz, I can set the number of servings to the number of oz that I ate. In this example, 4:
We like to use this trick for things like rice, too.
Find the entry that matches your food, like “Cooked Jasmine Rice”, change the serving size to 1 gram, and then adjust the number of servings to the number of grams that you dished out.
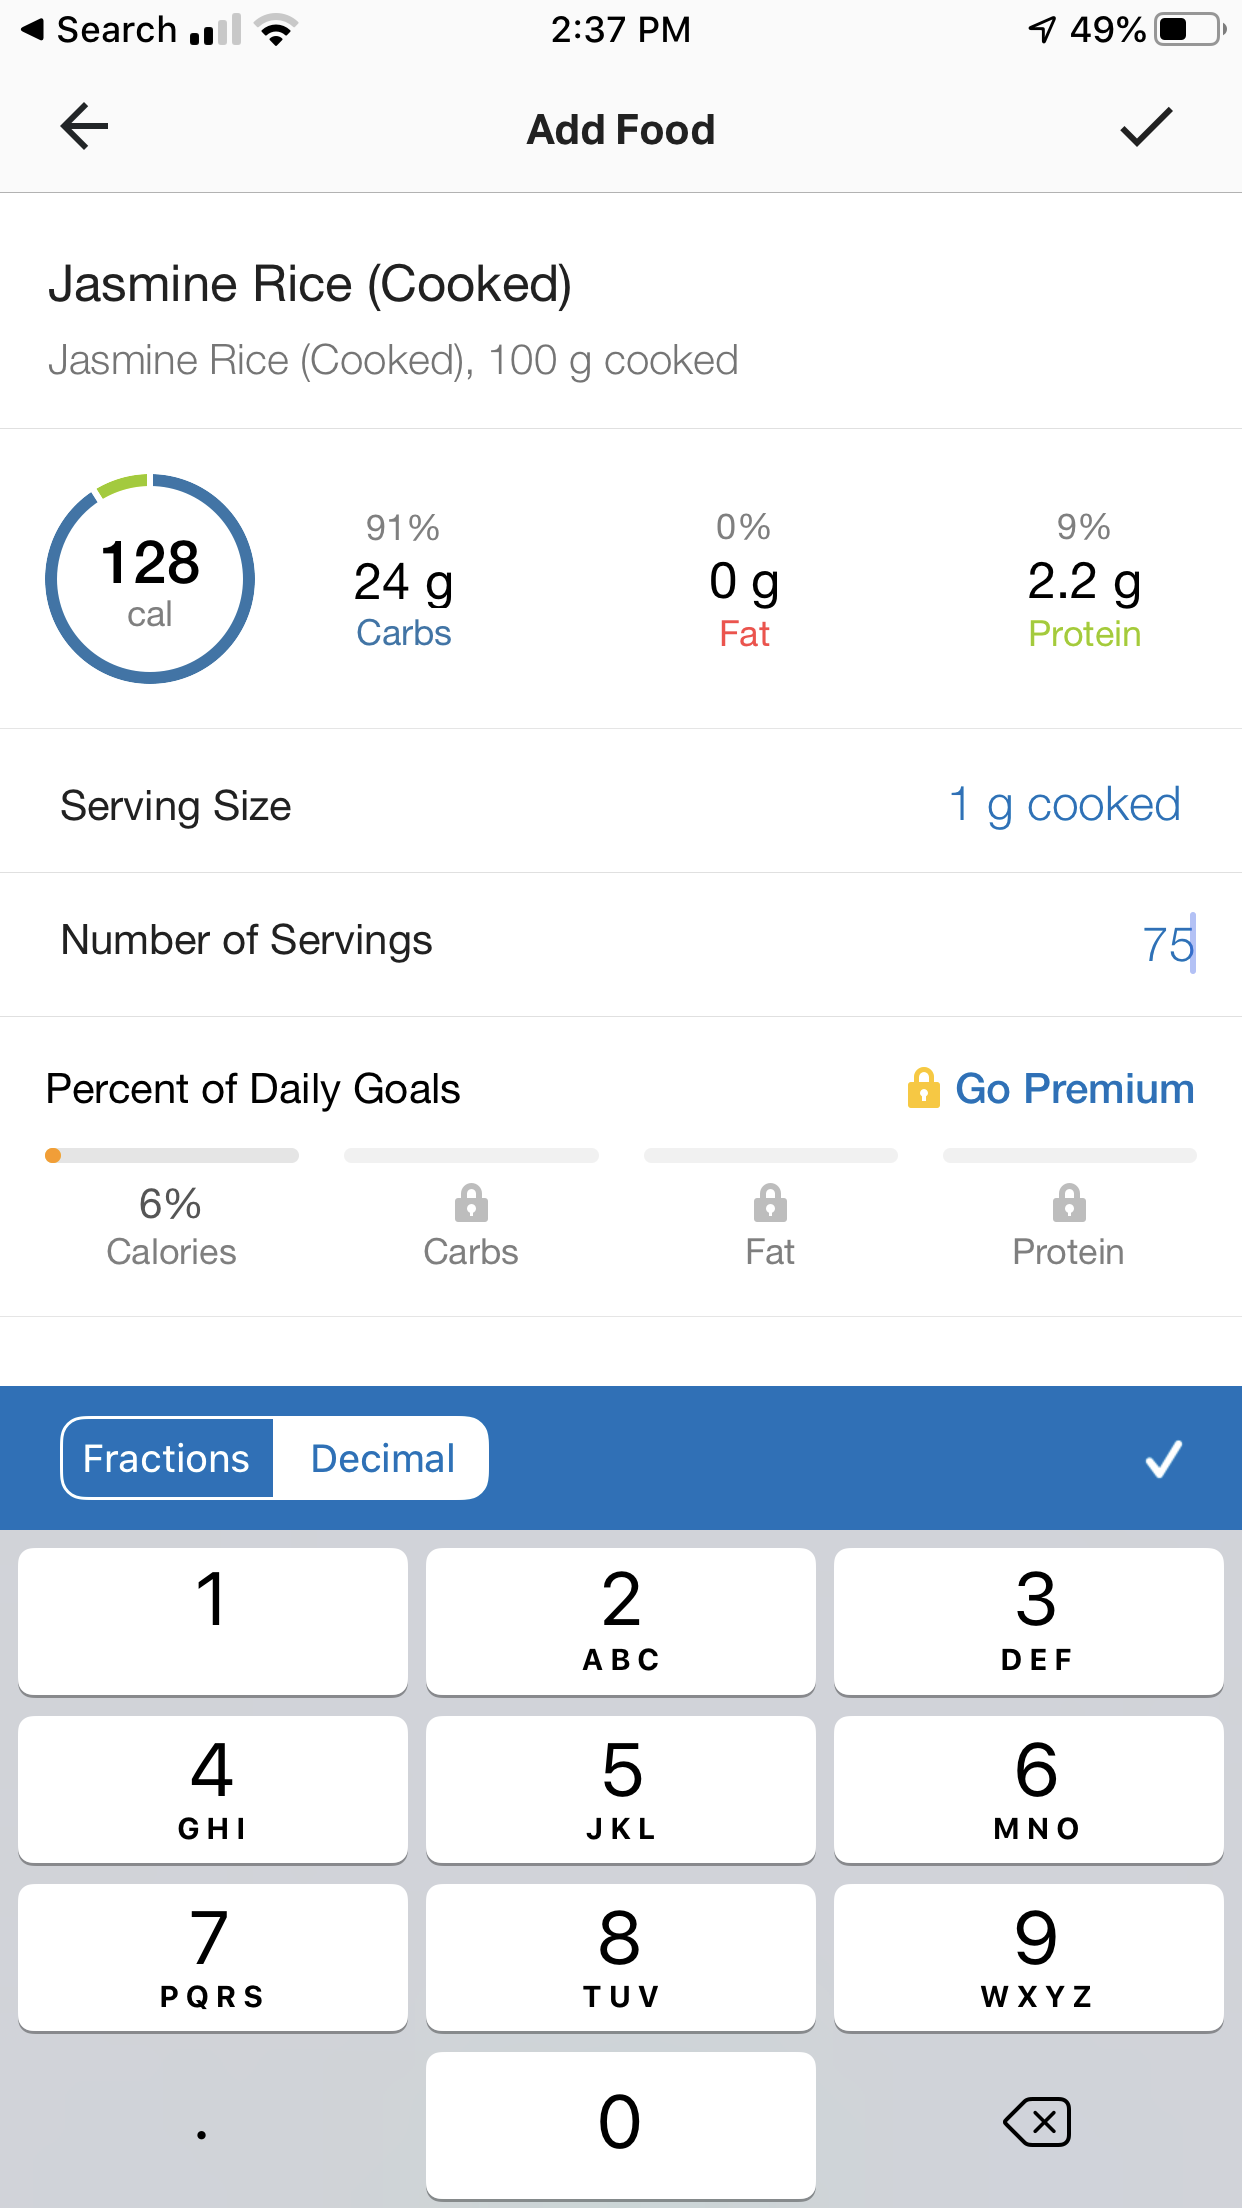
The reason we like doing this is because it keeps it simple and simple is more accurate. I can’t tell you the number of times we’ve been digging in clients’ food logs and seen things like “I had .6777 servings of 3/8” of a cup of rice”. My mind is blown and I have no clue (and they don’t either) what they ate.
Look for grams and oz, not cups and fractions. Trust us.
Reviewing your Diary Screen
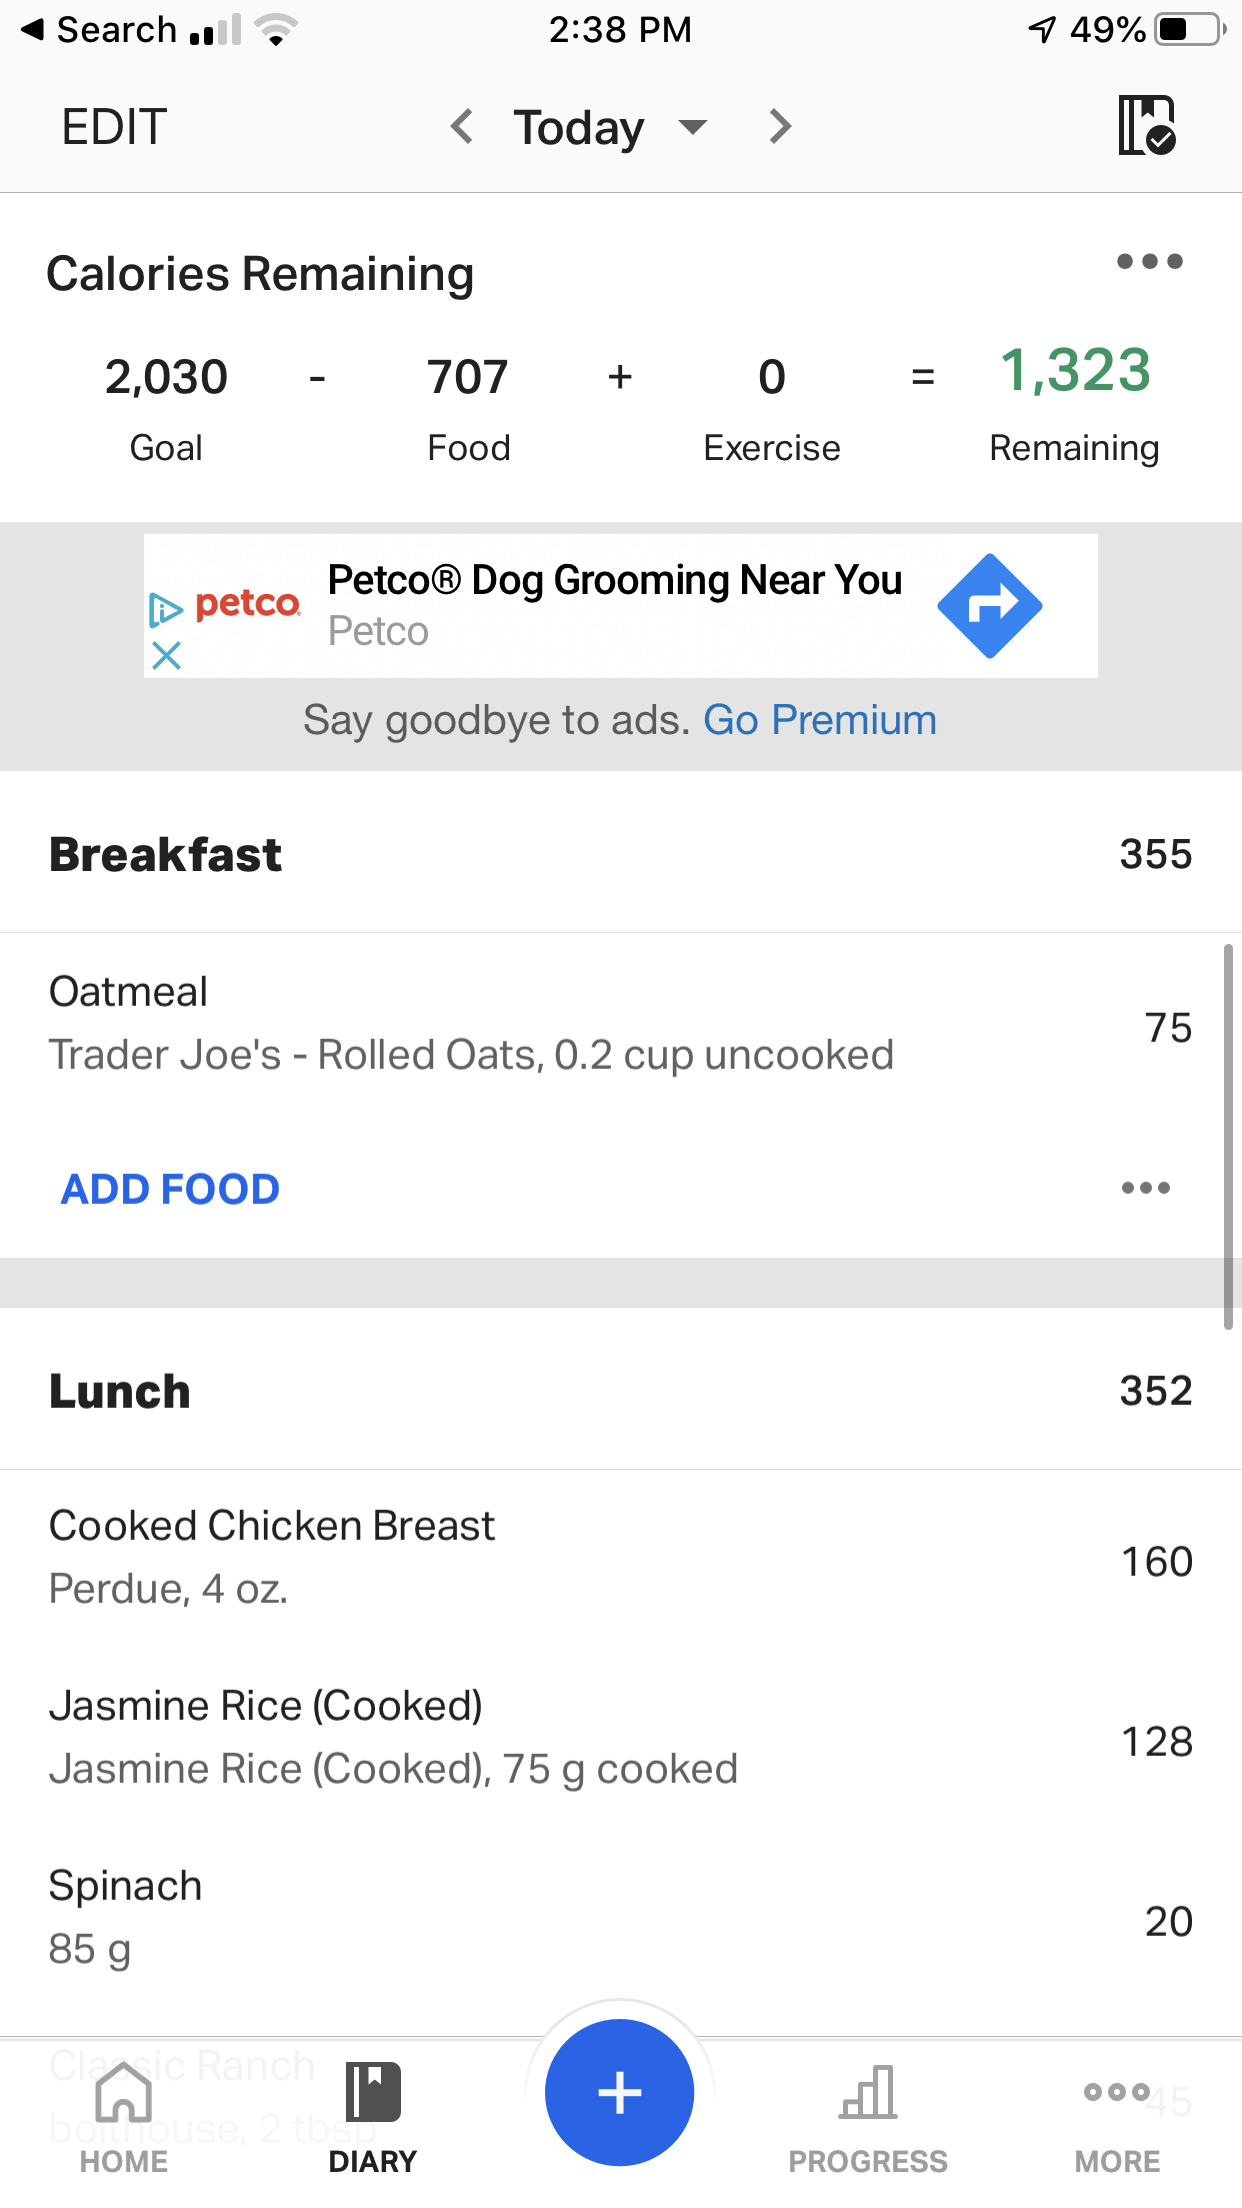
You can see up top how many calories you’ve logged so far that day and how many you have left.
Click on the green number that is your “Remaining” calories and your “Nutrition” page will open:
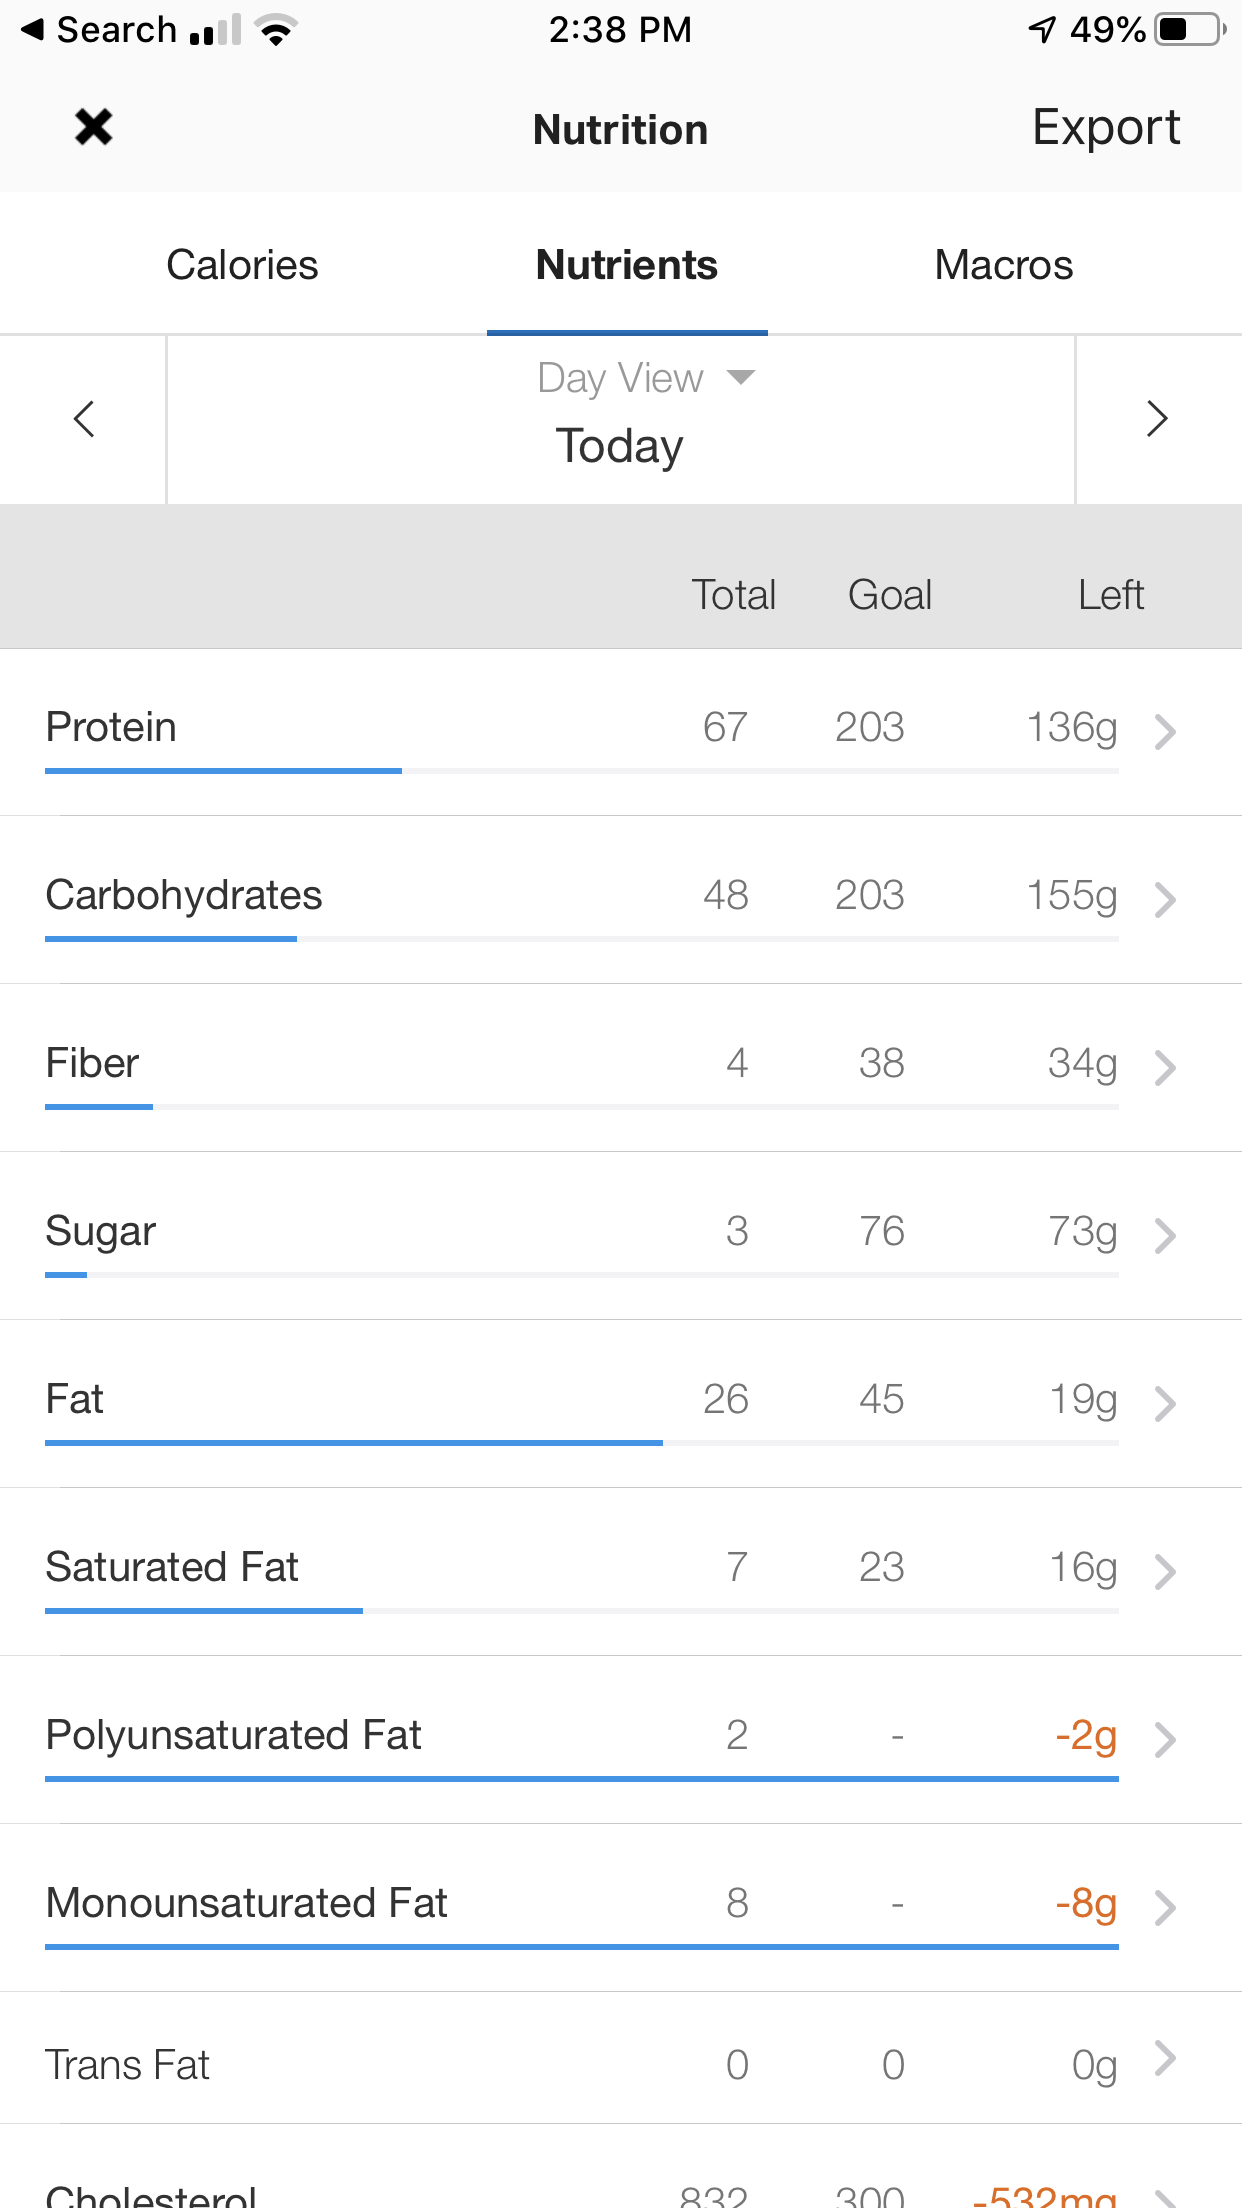
This page is useful to not only see how many grams of protein, carbs and fat you’ve eaten that day vs. your goals, but also see how much of other things you’ve had like vitamins and minerals.
If you click on “Calories” up top you’ll get a pie chart of the number of calories you’ve had, and if you click on “Macros” you’ll see a chart of how your macronutrients have been broken up that day.
WHEW!
We know, it’s a lot to learn and a lot to do but just like anything that’s worth anything, there is some effort involved. The good news is that as with any skill, you’ll get better with practice.
Hang in there and give it a shot. You’re worth the effort.
We know that we didn’t into the nuts and bolts of how to set your calorie and macronutrient goals. That would have pushed this post past the limits :)
If you have questions, send us a message. We’re happy to help you.